Posted on Leave a comment

What to Do After the Flood

Indoor mold is tied to numerous health conditions such as asthma, chronic sinusitis, allergies, bronchitis, and even depression. That’s why, after a flood, it’s critically important to quickly dry your home and dispose of most water-soaked items immediately. The goal is to head off the emergence of harmful mold growth, which can develop within 24-48 hours.

Here are the key Do’s and Don’ts after a flood:

Be safe

Before you worry about your stuff, make sure you’re not putting your life at risk.

  • If you have evacuated, do not return or enter the building until the authorities have given clearance. 
  • Water damage can cause structural problems and unexpected events like ceiling collapses. 
  • Water and electricity don’t mix. Be sure the power is off before you enter. Avoid touching appliances.
  • Watch for debris and sharp objects, and be careful on muddy and slippery surfaces.

Act quickly

Mold growth can occur in as little as 24-48 hours following a flood, even a small one. If you get to it fast, you’ll save yourself from a massive remediation bill and potential health issues. Remember: most insurance doesn’t cover mold.

  • Harmful flooding is not always caused by severe weather. 
  • Plumbing failures, sewage leaks and roof defects are all common gateways to dangerous mold growth.

Prevent illness

Flood waters bring unique risks. Proper sanitation and basic hygiene are vital during the emergency period directly following a flood.

  • Wear rubber boots, waterproof gloves and an N95-rated respirator during clean-up. 
  • Before eating and after toilet use always wash your hands with soap and boiled or disinfected water. The same applies to cleanup activities or when handling items contaminated by floodwater or sewage.
  • Flood waters often contain fecal matter from sewage systems, agricultural and industrial waste, or septic tanks. Keep clean any open cuts or sores exposed to floodwater.
  • Do not allow children to play in floodwater or with toys that may have been contaminated.
  • If floodwaters are covering your septic tank and leach field, do not flush toilets attached to the system.

Prevent mold growth

Moisture that enters buildings from leaks or flooding accelerates mold growth. 

  • Individuals with known allergies, asthma, respiratory illness or a compromised immune system SHOULD NEVER clean or remove mold. They shouldn’t even enter the building until it’s clean, dry and remediated.
  • Make sure the building is well-ventilated.
  • Open windows and, if possible, utilize pumps, fans and dehumidifiers.
  • Be careful about mixing household cleaners and disinfectants, as combining certain types of products can produce toxic fumes and result in injury or death. 
  • If mold growth has already occurred, it’s best to have a professional remove it. 

When in doubt, throw it out

It’s unwise to try saving moldy, porous items (i.e., items that absorb water) in the aftermath of a flood, but there are some things that may be salvageable. When in doubt, throw it out.

Items that can be saved typically include:

  • Nonporous items like china, glass, jewelry, porcelain, and metal
  • All-wood furniture with mold growth but otherwise in good condition
  • Some electronics and small appliances (depending on flooding conditions)
  • Photographs, books and valuable or important legal documents with minor levels of mold growth
  • Artwork, textiles and clothing that are not physically damaged
  • Items of high monetary or sentimental value should be evaluated on a case-by-case basis.

Dispose of immediately the following items if you can see or smell mold on them, or if they’ve been under water:

  • Carpet, carpet padding and rugs
  • Upholstered furniture, mattresses and box springs
  • Computers, microwaves, window A/C units, and other electronics/appliances with fans that are housed in moldy rooms
  • Papers and books with more than minor levels of mold growth
  • Food items—including canned foods—that came in contact with flood waters

Additional household clean up

Walls, hard-surfaced floors, and many other household surfaces must be cleaned with soap and water and then disinfected.

  • For these surfaces, disinfect with a solution of 1 cup bleach to five gallons of water. (Note: To avoid toxic fumes, a cup of vinegar instead of bleach makes an effective biocide for mold. In many cases, a simple detergent like trisodium phosphate [TSP] will do fine.)
  • Thoroughly disinfect surfaces that come in contact with food and children’s play areas. 
  • Replace fiberboard, insulation and disposable filters in your heating/cooling system.

Garbage storage, collection and disposal

As you clean, you will likely produce a great deal of garbage.

  • Garbage invites insects and rodents who may be scouring for food if the flood destroyed their homes and normal food sources.
  • Put garbage in a convenient location but not near a well. Store in watertight, rodent/insect-proof containers with tight-fitting covers. Use plastic liners if available. 

Prevent mosquito-borne illness

Heavy rains and flooding can lead to an increase in mosquitoes that may be infected with harmful viruses. 

  • Wear clothes that cover most of your skin.
  • Avoid being outdoors when mosquitoes are most active. For many species, this is during the dusk and dawn hours.
  • Repellents containing DEET (N,N-diethyl-m-toluamide), picaridin or OLE (oil of lemon eucalyptus) are options for mosquito protection. Do not allow children to apply repellents and avoid getting them on their hands.  
  • Check around your home for standing water, and eliminate other potential breeding sites.
  • Remove old tires.
  • Turn over or remove empty containers that hold water.

Overall, when it comes to the aftermath of a flood, always remember: Be careful, be fast, and be resilient!

Posted on Leave a comment

3 Simple Ways to Reduce Humidity Levels in Your Home

Hand cleaning a water spill off the floor with a blue towel. Find out how to reduce excess moisture and humidity in your home to prevent mold growth.

Do you need to reduce humidity in your home?

Don’t wait to address a water leak or excess humidity. The clock is ticking. Every hour that passes after a water leak— or excessive humidity builds up — means you’re getting closer and closer to a mold problem.

Discover how long you have to fix the issue and 3 simple ways to reduce humidity in your home.

How Long Until Excess Moisture Leads to Mold Growth?

The industry standards for water damage and mold removal state that you need to take action in the first 24-48 hours to prevent your moisture problem from becoming a mold problem.

Why?

Mold spores are ubiquitous. They are found everywhere, in every climate, and every place. Mold spores make their way into your home in many ways. A gentle breeze carries them in from open windows, and spores can hitch a ride right in your front door on the bottom of shoes or on your pet’s fur.

Mold spores are everywhere.

But mold spores don’t become a mold problem until excess moisture comes into play.

“Once fungi are inside,” says the World Health Organization, “growth can only occur in the presence of moisture.”

Moving quickly to control moisture in your home is essential for preventing a mold problem.

These three steps can help you reduce indoor humidity.

1. Control the Source

Before you can start reducing the amount of moisture in your home, you’ll need to identify and control the source.

While this sounds like a job for a professional, fear not. With a little sleuthing (and a few affordable tools), you can most likely find the source of a water leak or excess humidity all on your own.

You can use a hygrometer to measure the humidity in various home areas. Everyday tasks such as cooking, cleaning, and laundry can contribute to increased humidity levels, so check kitchens, bathrooms, and laundry areas.

Infrared cameras and water sensors can help you determine if an unseen water leak is causing humidity to build up inside your home.

2. Ventilate

Now that you’ve stopped the excess moisture from coming into your home, it’s time to remove the moisture built up inside.

When it comes to ventilation, your first instinct may be to throw your windows wide open. But, depending on your climate, opening a window may do more harm than good. If you live in a particularly humid environment or it is the middle of the rainy season, opening a window could allow excess humidity to enter your home, exacerbating your moisture problem even further.

The best way to ventilate your home is to run exhaust fans in kitchens, laundry rooms, and bathrooms.

That’s right: exhaust fans aren’t just used for removing foul odors from these parts of the house!

When you start cooking, running a shower, or doing a load of laundry, a properly functioning exhaust fan will vent the moisture out of the home.

A note of caution, however.

In order to properly ventilate moisture and reduce humidity, all exhaust vents must vent moisture outdoors, not send moisture into the attic or wall cavities.

If your exhaust vents are just sending moisture to other parts of the house, they will only make your moisture problems more severe and possibly aggravate mold growth in hard-to-reach areas.

3. Dehumidify

If you have utilized your home’s exhaust fans and your moisture meters and other tools are still alerting you to excess humidity levels, it may be time to try a dehumidifier.

Dehumidifiers range from portable units to whole-house add-ons for HVAC systems. They work by removing moisture from the air and collecting it in a tank.

Dehumidifiers should be set at the lowest setting for maximum effectiveness. You can find models with automatic drainage functions so you don’t have to constantly empty the water collection tanks. Most will empty the moisture via a straw which will deposit the water down a floor drain.

Pro Tip: Use humidity gauges and dehumidifiers in tandem for maximum effectiveness. Set alerts and utilize mobile apps and automatic settings to ensure your home remains at the ideal indoor levels of humidity: between 40% and 60%.

Check out the Consumer Reports Dehumidifier Buying Guide to get dehumidifier ratings for some of the most popular brands.

Dehumidifying with your HVAC System

Did you know that air conditioning units aren’t just for cooling your home? HVAC systems can also be used for dehumidifying. While it is bringing down your home’s temperature, a properly functioning (and properly sized) AC unit can also remove excess moisture from the air.

A Warning About Window Units

When it comes to using a window air conditioning unit for dehumidifying, bigger is not always better. Significant mold growth can often be found on the insulation in air conditioning units. This is fairly common when units are oversized, which causes the unit to cycle on and off. During this process, condensation can develop on the insulation, and sometimes the coils, inside.

Running an AC unit on a lower setting and avoiding the cycle-on, cycle-off process can help prevent mold growth due to condensation buildup. Alternatively, a smaller unit that’s a better fit for the room is a better buy than a too-large unit.

How big should your window unit be? Check out this calculator to find the right size air conditioner for your room.

What happens if you don’t get your moisture problem under control? Read our Complete Guide to Humidity and Moisture in the Home to get more information on ways to prevent and control the moisture issues that can quickly turn to mold problems at home.

Posted on Leave a comment

4 Tools to Measure Indoor Humidity And Find Water Leaks

An infrared camera measures temperature changes in a house. Discover 4 tools to find water leaks and moisture problems in a home.

Can you measure indoor humidity levels and find water leaks on your own, or do you need a professional to do the job?

There’s no need to guess when it comes to how much moisture is in your home. You can use tools to monitor your indoor humidity levels and find water leaks — and you can easily find them at local hardware stores and online.

How Humidity is Measured: Relative Humidity vs. Absolute Humidity

Before we get into tools that measure humidity and moisture in your home, let’s take a moment to talk about the different ways humidity is measured.

Relative Humidity

Relative Humidity (RH) is the amount of water vapor present in the air relative to the amount it could hold at that given temperature.

When air gets warmer, it expands and can hold more water vapor.

When air gets colder, it contracts and can hold less water vapor.

Let’s do a little science experiment in our minds to picture this better:

Imagine a 12-ounce cup filled with 6 ounces of water. This is our control cup. It’s 50% full of water.

Now imagine that it’s a hot day. As the day gets warmer, that cup expands and gets bigger. You now have a cup that could hold 24 ounces of water. This bigger cup is still filled with 6 ounces of water, but now the cup is only 25% full.

Now imagine that it’s a cold day. And the colder it is, the smaller your cup gets. Your cup has shrunk down to a 6-ounce size. If your 6-ounce cup is filled with 6 ounces of water, your cup is 100% full.

All 3 cups held the same amount of water.

But the measurement of water changed relative to how much each cup could hold.

This is how relative humidity is measured. It’s the amount of water vapor the air can hold at any given temperature, and the result is expressed as a percentage.

Absolute Humidity (AH):

Absolute humidity is the actual amount of water vapor present in the air, regardless of the temperature.

Absolute humidity compares the mass of water vapor to the mass of dry air, and it’s expressed as a ratio in grams of moisture per cubic meter of air (g/m3).

Absolute humidity is entirely independent of temperature. It measures how much water vapor is in the air, regardless of the temperature.

Usually, when we’re talking about ideal humidity levels (between 40% and 60%), we’re talking about measuring and monitoring relative humidity (RH) levels. You can learn more about humidity — and the problems it can cause — at our Complete Guide to Humidity and Moisture in the Home!

Now, on to the tools!

4 Tools to Measure Humidity and Moisture in Your Home

Hygrometers

A hygrometer is a tool used to measure the amount of water vapor (humidity) in the air. Remember when we talked about temperature affecting humidity levels above? Your hygrometer will typically measure the relative humidity (RH) of your air and show you the temperature as well as its correlating humidity percentage.

Hygrometers have come a long way from their first designs when inventors used oak husks or human hair to measure humidity! Today’s humidity measuring tools use semiconductive materials or mercury thermometers to precisely measure relative humidity.

Modern hygrometers will usually have a nice, big easy-to-read digital display.

Even better, many digital hygrometers connect to Wi-Fi or Bluetooth and send you text or email alerts when your temperature and moisture levels exceed the pre-set limits. What should your ideal indoor humidity levels be? ASHRAE recommends a target level of 45% RH, but hitting that exactly on the nose can be difficult. It’s easier to set an ideal range of 40-60% humidity.

Monitoring is easy with digital hygrometers that feature apps (for iPhone or Android) that allow you to monitor humidity levels on the go. And it allows you to know when something is off and you need to take action, no matter where you are.

Look for a hygrometer that allows for multiple wireless sensors so you can monitor humidity levels of various locations throughout your home. Most moisture and mold problems occur in your home’s “out of sight, out of mind” places, such as attics, basements, crawl spaces, and other tucked-away places that you don’t often frequent.

Moisture Meters

Moisture meters are valuable tools to help you detect moisture in building materials such as wood or wallboard. If your home has a water leak in an out-of-sight location, such as behind a wall or ceiling, a moisture meter can help you find it even if you can’t see it.

There are two types of moisture meters; pin-type moisture meters and pinless moisture meters.

Pin-type moisture meters use two electrodes to scan for moisture by inserting the probes into drywall, or whatever material you’re concerned about,. although they are designed and calibrated to measure moisture in wood. Since the device looks for moisture readings between the electrodes, it can only scan a smaller and more precise area. Pin-type meters are typically used in home inspections. Keep in mind that they leave small holes where you probe, so be ready with your spackle if it’s in a visible area. These tend to be the least expensive type, and also the most user friendly.

Pinless moisture meters scan larger areas and make finding moisture readings and leaks a lot quicker. Pinless meters use electromagnetic waves (like radio waves or an electrical current) that are affected by moisture. They can be more difficult to read because different materials have different densities, and varying conductive properties. This type of moisture meter is most often used by professionals, and can get fairly expensive.

The key to using a moisture meter is to take things slow, be prepared for false readings, and always look for the source. Wet materials are a problem, but the real issue is how they got wet in the first place.

Water Sensors

Time is of the essence when you have a water leak at home. Often, a water leak can cause damage long before you see a visible sign of the leak.

Place a water sensor in leak-prone areas of your home, such as near:

  • Sinks
  • Toilets
  • Fish tanks
  • Sump pits
  • Dishwasher
  • Hot-water heaters
  • Washing machines
  • Furnaces and boilers
  • Refrigerators with ice makers and water dispensers

Some water sensors are Wi-Fi enabled so you can get instantly alerted to a water leak in your home. Others may be configured to shut off the water in the house to prevent a small leak from becoming a big problem.

We recommend: Sensative Strips Drip with 10 years of battery life.

Infrared Cameras

A new tool is now much more accessible for consumers to use at home: infrared cameras.

Infrared camera don’t really “see” through your walls, however, they are really good at measuring surface temperatures. What does this have to do with water leaks? A wet spot will register colder than its dryer surrounding areas because of evaporation. These cameras used to be $50-60k, but tech advances now mean you can get a good one for a few hundred dollars.

They are more advanced, not for every user, but can be incredible for finding leaks, wet or missing insulation, leaky ducts, issues in the ceiling and more.

The key is to use them effectively is to consider an infrared camera a screening tool, and then go on to investigate with moisture meters and other tools to collect more data.

Conclusion

Tools that help you detect water leaks and monitor/measure your indoor humidity levels can help you take control over moisture problems in your home. Excessive moisture can lead to mold growth, structural damage, an increase in pests, and more symptoms that can be harmful to the building and the health of occupants.

Luckily, these tools are easily found online or at your favorite hardware store, and help you take back control of your home’s health and safety.

Posted on Leave a comment

5 Symptoms Of High Humidity In Your Home

A shocked woman looking at mold on her wall. Find out 5 symptoms of excess moisture in the home.

Are you monitoring humidity levels in your home? Maintaining an ideal humidity range inside your home is more important than you may think. The amount of moisture in the air (humidity) in your home can mean the difference between a healthy home or a home that’s making you sick.

Even without a humidity gauge—known as a hygrometer— to measure the amount of moisture in your air, it can be fairly obvious when you have a humidity issue.

At least, it is if you know what to look for.

5 Symptoms of High Humidity in Your Home

These five issues can be directly tied back to excess humidity or a water leak in your home.

1. Mold

A mold problem in your home always originates from a moisture


Tumore prostatico: la prognosi in base a stadio, grado e rischio

Tumore prostatico: la prognosi in base a stadio, grado e rischio

problem.

Anywhere from 30% to 50% of homes globally have issues with dampness and mold, according to a World Health Organization (WHO) Report on Indoor Air Quality – Dampness and Mold.

Mold spores, which are like microscopic reproductive seeds, are found in the dust and surfaces of every house, including those that don’t have issues with dampness, says WHO.

Mold spores are ubiquitous.

Spores make their way into your home through open windows and doors or by hitching a ride on shoes, clothing, and even pets. And then they wait for the right conditions to thrive.

“Once fungi are indoors,” says the WHO report, “growth can occur only in the presence of moisture.”

Like all living things, mold also needs nutrients to survive. However, your house offers plenty of those in the form of household dust, construction materials, wallpaper, wood, paint, glue, books, and other paper products (to name a few). Modern buildings are made of materials that most molds find delicious, such as drywall, so there’s no shortage of nutrition.

Since removing all fungi food sources from your home is nearly impossible, maintaining ideal humidity levels is critical for preventing mold growth.

2. Insects, Pests, and Arachnids

Spiders, dust mites, and rats, oh my! The second sign of excess moisture and humidity in your home is an increase in uninvited critters and creepy crawlies.

Critters need moisture to survive, and damp homes offer plenty of water for insects, arachnids, and rodents to drink up.

Not to mention the miniature “circle of life” that occurs once mold becomes a food source for small bugs, which then become a food source for larger bugs and spiders, which, in turn, become a food source for rodents, and so on.

Dust mites in particular love to eat mold! (Researchers have found mold spores in their feces and attribute much of the allergenicity to the unique qualities of this lovely combination.)

They’re not the only critters that like to make mold a meal, either.

Booklice (small, soft-bodied insects) usually eat mold, fungi, and glue from book bindings. In homes, booklice are often found in damp areas and are a clear signal that your home has a mold problem.

And then the spiders come along and eat the booklice. And the rodents eat the spiders. It’s like the nursey rhyme, the Old Lady Who Swallowed a Fly.

The longer the moisture problem, the larger the critters, and the more of them you’ll find. Take away the water and they find somewhere else to party. It’s that simple.

3. Respiratory Health Issues

Could respiratory health issues have more to do with poor indoor air quality, due to dampness and mold in your home, than viruses or bacteria? any kind of viral or bacterial infections? Emerging medical research supports this notion.

A pair of studies from the U.S. Department of Energy’s Lawrence Berkeley National Laboratory (Berkeley Lab) and the U.S. Environmental Protection Agency (EPA) estimates that 21 percent of current asthma cases in the U.S. are attributable to dampness and mold exposure.

Of the 21.8 million people reported to have asthma in the U.S., approximately 4.6 million cases are estimated to be attributable to dampness and mold exposure in the home, reports study researchers.

When it comes to predicting asthma, dampness and mold in the home are ranked second only to family history of asthma as a risk factor.

Did you know? Kids who live in a house with a musty “moldy” odor are 2 times more likely to get asthma than kids who don’t. 

How does dampness contribute to asthma?

Researchers suggest that it’s not the excess moisture itself that causes asthma issues, rather, it’s that the moisture influences the growth of various microorganisms that leads to respiratory health issues.

In another study on indoor dampness and asthma, researchers suggest that dampness may lead to the development of asthma, exacerbate existing asthma, and that the factors related to dampness that lead to asthma were most likely attributed to the fungi and dust mite allergens.

The most recent evidence from epidemiologic studies and meta-analyses also show indoor dampness or mold to be consistently associated with increased asthma development and exacerbation, dyspnea, wheeze, cough, respiratory infections, bronchitis, allergic rhinitis, eczema, and upper respiratory tract symptoms—in allergic and nonallergic individuals.

4. Rot and Decay

A building’s longevity is directly connected to its ability to shed water.

In a Building Moisture and Durability report prepared for the U.S. Department of Housing and Urban Development (HUD), moisture is named as the “single greatest threat to the durability and long-term performance” of homes and buildings.

Excessive exposure to moisture is not only a common cause of significant damage to many types of building components and materials, states the report, but it also can lead to unhealthy indoor living environments.

Some of the more serious effects resulting from moisture problems in houses include:

  • decay of wood and corrosion of metals
  • infestation by termites, carpenter ants, and other insects
  • negative impacts on indoor air quality
  • the growth of mold, mildew, and other biological contaminants
  • reduced strength in building materials
  • expansion/contraction damage to materials
  • reduced thermal resistance of wet insulation
  • premature failures of paints and coatings
  • damage to building contents
  • negative effects on building aesthetics

Why is moisture public enemy #1 when it comes to the durability of your home?

Consider the materials used to build a single-family or multi-family residence.

Most building structures begin with a concrete slab foundation that sits in the surrounding soil. Concrete is made from a mixture of crushed stone and a paste made from water and cement. During the drying and curing process, most of the water from inside the concrete works its way out through tiny highways called capillaries. Unfortunately, these tiny moisture highways are two-way streets. Not only can water work its way out of the concrete, but water can also work its way back in via excess humidity, water leaks, and even excess moisture in the soil around the house. (This is known as capillary action.)

It’s like a giant sponge sitting at the base of your home.

Now consider typical building materials that go on top of that concrete slab foundation, such as wood, gypsum wallboard, fluffy insulating materials, carpet, and carpet padding, to name a few. Like concrete, these materials also act like sponges when it comes to moisture, but, unlike concrete, they also do double-duty as nutrient sources for fungi.

This is why we recommend you don’t finish your basement…until you read this.

Fungi cause considerable damage to buildings, according to the WHO Guidelines for Indoor Air Quality.

5. Structural Issues

Not even the dumbest of the three little pigs ventured to make a home out of paper, yet with drywall at the center of our modern construction process, it is much like building houses out of paper maché.

We essentially build ourselves self-composting homes; just add water. The wood we build with is often young wood, and loaded with sap—it’s a tasty treat to wood-eating bugs such as termites and wood-rotting fungi, to name a few.

And, as we covered above, our building materials are prone to rapid degradation when exposed to moisture.

Too much dampness in a building can erode away building materials, corroding metals, decaying timber, softening and crumbling plaster, and disintegrating bricks, stones, tiles, and flooring.

As damp building materials degrade, they release emissions of volatile organic compounds (VOCs)—including formaldehyde—which can lead to increased indoor air pollution and negative health effects for occupants. The use of potentially hazardous chemicals such as pesticides to target termites and pests or chemical biocides meant to “kill” mold can add even more VOCs to the indoor air, and also leave a toxic residue on surfaces, which can become easily airborne and inhaled.

Nasty stuff.

Worse, structural damage from a moisture problem at home most likely isn’t covered by your insurance policy, either. Most homeowners’ policies are designed to cover structural damage that occurs as a result of a specific event (like a hurricane or explosion), NOT from chronic dampness in your home. Damage that happens gradually—like the settling, shrinking, and cracking of your foundation—is typically excluded by homeowners insurance.

Which means you could be left holding the bill for your structural damage caused by dampness, mold, and termites.

Now What?

Now that you know that mold, pests, respiratory illnesses, rot, decay, and structural issues are all signs that you have a moisture problem at home, what comes next? Check out our Complete Guide to Moisture and Humidity in the Home to discover what your ideal household humidity level should be and what steps to take to address the moisture problem for a healthier home.

Posted on Leave a comment

3 Signs You Need To Worry About Moisture And Mold In Your Home

Young woman in yellow sweater holding her nose in her home because of a bad smell. Discover 3 signs that you need to be concerned about mold and moisture in your home.

Do you need to be concerned about moisture and mold in your home?

According to the U.S. Department of Housing and Urban Development, moisture is public enemy #1 in your home. Excess humidity levels or water leaks can lead to mold growth, attract pests, increase allergens, cause structural issues through rot and decay, and negatively impact the health of occupants.

Unfortunately, it’s not always easy to see signs of a water leak or humidity issues in your home.

Sure, a flooded basement is obvious.

But not all sources of excess moisture in the home are immediately apparent.

Excess humidity inside your home can be caused by everyday activities such as air-drying laundry, cooking, and showering, to name just a few.

Luckily, your senses can help you identify moisture and mold issues at home. So, when should you worry about moisture or mold?

#1. You See Something

Mold

Visible mold is an obvious example of seeing something that’s not quite right.

While people tend to be concerned about toxic black mold, mold actually comes in a range of colors. Mold often tends to start growing as fuzzy, white fibers. As it develops and reaches maturity, mold will start to look gray, green, or black. It usually grows in a circular pattern but can also grow in patches or streaks.

Dark spots of mold are an easy red flag to notice!

But excess humidity and water leaks also leave other visible signs in their wake.

Condensation

Condensation is the change of water from its vapor form into liquid form. It generally happens when water vapor in warm air encounters a cool surface (like a window) or pockets of colder gasses.

When the steam from the shower covers your bathroom mirror or your glasses steam up when you lift the lid of a boiling pasta pot, that’s condensation in action.

In your home, condensation on the interior of windows and doors occurs when warm, humid air comes into contact with a cool surface.

As a result, you’ll see water droplets form on window glass, exterior doors, and even down near the ground-level of closets or rooms with exterior walls.

Signs of Rot and Decay

Excess humidity or hidden water leaks will flip a switch on the process of rot and decay, essentially “turning on and turning up” the cycle of destruction for your building materials.

Some of the visible signs of rot and decay due to moisture in your home include:

  • decay of wood (soft, rotten wood)
  • corrosion of metals (rust)
  • blistering and peeling paint
  • water stains
  • discoloration on surfaces
  • trim pulling from the wall

Any visible sign of degradation of your home (or its building materials) is another red flag of a moisture issue.

Insects and Pests

Water is life. It makes up the majority of our planet and the majority of our bodies. Plants and animals need it to survive.

Including pests.

When your home has become a source of water, you are likely to notice an increase in the critters in your home, such as:

  • dust mites
  • water bugs
  • insects
  • arachnids (spiders)
  • wood-eating insects (termites)
  • rodents
  • and more

Have you noticed an increase in creepy crawlies, critters, and pests in and around your home?

It may result from a water leak or excess humidity providing lots of wonderful, life-giving water to the tiny creatures that like to share our spaces.

#2. You Smell Something

Does your house smell a little funky?

If your household visitors are wrinkling their noses when they enter your home or if you feel like your house smells like mold, stinky socks, old cheese, or dog farts (hey, you don’t even have a dog!)… your nose might be telling you something.

Microbial volatile organic compounds (mVOCs) are strong-smelling compounds produced by fungi (mold) and bacteria during their metabolic processes.

“Because mVOCs often have strong or unpleasant odors, they can be the source of the ‘moldy odor’ or musty smell frequently associated with mold growth,” says the Environmental Protection Agency (EPA).

“A moldy odor suggests that mold is growing in the building and should be investigated.”

The bad news is: a musty or moldy odor is a giant red flag that you’ve got mold growing somewhere. Furthermore, it’s more than an aesthetic nuisance. It’s also a health hazard, as you will see below.

The good news is: your nose can alert you to the presence of mold even if you can’t visibly see it anywhere.

Why is this good news?

Well, if you smell something, you can do something. Like confirm that you have a mold or moisture problem and take steps to get it fixed.

If you couldn’t see it and couldn’t smell it, the mold growing in some out-of-sight place in your home may be left to run rampant. So thank your nose for doing its job and alerting you that something in your house just isn’t right.

Tip: fix it, don’t cover it! If your house smells funky, musty, or moldy, don’t just cover it up with scented candles, fabric sprays, or plug-in scents. Not only does covering up the smell not fix the problem, but household fragrances can be a source of hundreds of different chemicals, including VOCs (volatile organic compounds) that can lead to negative health effects ranging from migraines to respiratory issues, immune system problems, cardiovascular issues, and more.

#3. You Feel Something

No, we’re not talking about The Force, ESP, or other other-worldly sense that something is amiss. (Although, don’t discount the power of your intuition when it comes to your health!)

When we say “If you feel something, do something,” we’re talking about feeling respiratory, allergic, or other symptoms in your physical body.

Symptoms of mVOC Exposure

Researchers have discovered that kids living in a home that smells musty have double the risk for developing asthma compared to kids living in homes that are mVOC-free.

According to the EPA, the health effects of inhaling mVOCs are largely unknown, although exposure to mVOCs has been linked to:

  • headaches
  • nasal irritation
  • dizziness
  • fatigue
  • nausea
  • sinusitis
  • brain fog
  • allergic reactions
  • asthmatic episodes
  • irritated eyes, throat, and skin

Symptoms of Mold Allergies & Sickness

Everyone breathes in mold spores all day long, which can be found in outdoor and indoor air, mostly without any ill effect. Some people, however, have an allergic reaction similar to asthma symptoms when exposed to high concentrations of mold spores. Other people may develop sinusitis, an inflammation of the sinuses which can lead to infection. In these cases, the immune system is overly sensitive to mold spores and treats them as an invader, triggering a cascade of allergic symptoms.

According to the American Academy of Allergy Asthma & Immunology (AAAAI), symptoms of a mold allergy can look like:

  • sneezing
  • runny nose
  • nasal congestion
  • itchy, watery eyes
  • itchy nose, mouth and lips
  • asthma symptoms (such as wheezing, shortness of breath or chest tightness)

These symptoms are commonly found in an immune reaction to mold, which usually appear as allergy-like or respiratory symptoms.

However, the second type of mold response is an inflammatory reaction to mold.

An inflammatory response to mold is thought to be driven by mycotoxins, naturally occurring toxins produced by mold, which can initiate an inflammatory cytokine-driven response in the body. Although evidence is mounting that the chemicals in the musty odor are a significant variable in the mold and inflammation equation.

According to Parsley Health, this chronic mold-induced inflammation in the body has been linked to a wide variety of ill health effects, including:

  • cognitive difficulties (brain fog, poor memory, anxiety)
  • pain (especially abdominal pain, but can include muscle pain similar to fibromyalgia)
  • unexplained weight gain or weight loss
  • numbness and tingling in extremities or other areas of the body
  • metallic taste in the mouth
  • vertigo or dizziness
  • tinnitus (ringing in the ears)
  • digestive issues (especially limited tolerance to food, persistent bloating)
  • significant fatigue that interferes with daily activities
  • changes in mood
  • excessive thirst and dehydration, bed-wetting in children
  • symptoms that resemble hormone imbalances (hair loss, rashes)

As you can guess from looking at this list, the symptoms of mold-related/mycotoxin-induced illnesses could easily be mistaken for something else. Many things can cause inflammatory responses in the body, not just mold. So, inspecting and testing for mold problems in your home can help you and your medical professionals determine if mold is the culprit behind these symptoms.

Do Something!

Did you see a spot of mold, smell a musty odor, or experience a physical symptom related to mold sickness? Then it’s time to do something about it.

As we say here at GOT MOLD?:

“If you see something, smell something, or feel something… do something!”

Mold will not go away on its own. And neither will the physical symptoms that go along with mold allergies or mold toxicity. If you see, smell, or feel something, it’s time to take action. Get a confirmation that you have a mold issue through a mold test kit or inspection, so you can make a plan to get the moisture and mold problem under control.

To learn more about the dangers of excess moisture at your house, or for tips on how to get to the bottom of the issue, read The Complete Guide to Humidity and Moisture in the Home.

Posted on Leave a comment

What Is The Ideal Humidity Level In A Home?

A humidifier running inside a home. Discover what is the ideal humidity level in a home.

Do you know how humid your home is?

Humidity isn’t an issue reserved only for people living in hot, tropical environments. Even if you live in a cold or dry climate, you could still have household humidity issues to worry about. Too much (or too little) humidity can lead to problems, from mold growth to health issues for occupants.

Discover what the ideal humidity level should be in your home—and why it matters for the health and safety of your family.

What is Humidity?

Before we get into the ideal humidity levels for your home, let’s take a moment to understand better what humidity is and what can impact it in indoor and outdoor environments.

Humidity is the measure of the amount of water vapor in the air.

Remember when you were a kid and learned about the different forms of water? It can be liquid, like the water pouring out of your kitchen sink, solid, like the ice cubes in your freezer, or gaseous, like the water vapor found in the air.

If there is a lot of water vapor in the air, the humidity levels are high.

If you’ve ever been to someplace with high humidity, you’ll recognize the feeling: like you’ve stepped into a steamy shower room and can’t get dry, no matter what. You also likely felt hot and sticky; when the humidity is high, the air gets so clogged with water vapor that there isn’t much room for anything else. Even your sweat can’t evaporate off your body to cool you down because there’s no room in the air for any excess moisture to evaporate off you! You might also notice that cool surfaces, like cold water pipes and tile floors, are damp due to condensation.

If there is minimal water vapor in the air, the humidity levels are low.

If you’ve ever been someplace cold and dry, you’ll know how too little humidity feels. Without enough moisture in the air, your skin and mucous membranes dry out and feel chapped, cracked, and uncomfortable. Too little moisture in the air can also impact immune health, which we’ll learn more about in a minute.

When talking about humidity, what we usually reference is relative humidity or RH, or how much moisture is in the air compared to the maximum amount of moisture that can be contained in the air at a certain temperature. This is expressed as a percentage, as in 50% humidity, or 50% RH.

Another measurement of humidity is called absolute humidity. This represents the weight ratio of vaporized water to 1 kg of dry (moisture-free) air. This measurement is expressed as kg/kg, as in 0.008 kg/kg. This is mostly the measure used by nerds like us who study these things.

When we are measuring humidity levels and discussing the ideal humidity levels in a home, relative humidity is more commonly used.

So let’s focus on relative humidity and the percentages that make up a healthy, comfortable home!

What Impacts Humidity Levels?

Temperature is one of the more prominent factors when it comes to influencing humidity levels.

  • As temperatures rise, the amount of moisture the air can hold increases.
  • As temperatures drop, the amount of moisture the air can hold decreases.

Imagine a sponge. As the temperatures increase, that sponge gets larger and can absorb more water (or water vapor, to be more precise). But as the temperatures drop, that sponge gets squeezed smaller and tighter, resulting in less room for water.

Temperature isn’t the only factor that impacts humidity levels, either.

Your everyday household activities can release more water vapor into the air, such as:

  • cooking
  • showering/ bathing
  • watering plants
  • hanging laundry to dry inside the home

Plus, spills and water leaks can also release more water vapor into your home.

Even something as simple as opening a window can impact indoor humidity levels by letting in more water vapor from outside.

If your indoor air becomes too humid, it can result in a myriad of issues, including these five symptoms of excess humidity in the home.

What is the Ideal Humidity Level in a Home?

So what is the ideal humidity level for optimal comfort, health, and safety?

According to ASHRAE (American Society of Heating, Refrigerating and Air-Conditioning Engineers), the ideal indoor humidity range is between 40% and 60%.

Dry indoor air (between 0-40%) becomes a physical health hazard. It can impair the respiratory immune system defenses, allowing viruses to infect us more easily. Plus, evaporation of moisture leads to airborne viruses that can float through the air easier and survive longer, which increases our chance of catching viral illnesses.

Overly-moist indoor air (from 60% to 100%) can also feel uncomfortable to our bodies. But the big concern of overly humid air comes as it creates a water-rich environment for unfriendly organisms to grow and thrive. Mold is just one example of an organism that needs moisture to grow and spread. Another is dust mites, which thrive in humid environments. Between 40% and 50% humidity is ideal for controlling dust mites. Above 50% humidity and dust mites can go from bothersome to out of control.

“Relative humidity of 40-60% in buildings will reduce respiratory infections and save lives,” says Dr. Stephanie Taylor, Infection Control Consultant at Harvard Medical School.

Want to learn more about how moisture can impact the health and safety of your home and what tools can best help you measure, monitor, and control your humidity levels? Check out our Complete Guide to Humidity and Moisture in the Home.

Posted on Leave a comment

The Complete Guide To Humidity And Moisture In The Home

Condensation buildup on a window signaling a problem with humidity levels in the home. Get the guide to humidity and moisture in your home from gotmold.com

Most people don’t think much about excess humidity or moisture in the home. Until they have a serious problem, that is.

Excess moisture in the home can have a real impact on your comfort, health, and safety.

So before you find yourself fighting a moisture-related issue—like mold or structural damage—you may want to better understand how too much water can negatively impact your home sweet home.

In this guide to humidity and moisture in the home, you’ll get the 101 basics that help contribute to a healthy house, including:

  1. What causes moisture in your home?
  2. What problems are caused by excess moisture in the home?
  3. Signs of moisture problems at your house
  4. What is the ideal humidity in your house?
  5. How to check humidity levels
  6. How do I reduce moisture in my house?
  7. Who to call for moisture problems?
  8. What to do about moisture issues when you’re a renter?

Let’s dive in and find out why excess humidity and moisture can cause so many problems for health and home.

What Causes Moisture in Your Home?

Do you suspect you have a problem with excess moisture or water in your house or apartment?

There are only two possible sources of moisture in your home:

  • Air (humidity)
  • Water (flooding and leaks)

That’s it!

While this seems like a simple answer, moisture issues in the home can be a bit more complex. For starters, there are exterior and interior sources of water. There are many ways excess humidity can build up inside your home.

Excess moisture in the house can lead to issues ranging from structural damage to the building to health issues for your family.

What Problems are Caused by Excess Moisture in the Home?

If your house isn’t partially underwater due to a flood, do you really need to worry about a little bit of excess moisture?

Unfortunately, you do. Even a small imbalance can lead to big problems.

Moisture plays an essential role in the life cycle of both your building and the living things inside it. Too much water or excess humidity in your home can speed up the process of life and death for both.

Here are just a few ways excess moisture can cause problems in your home:
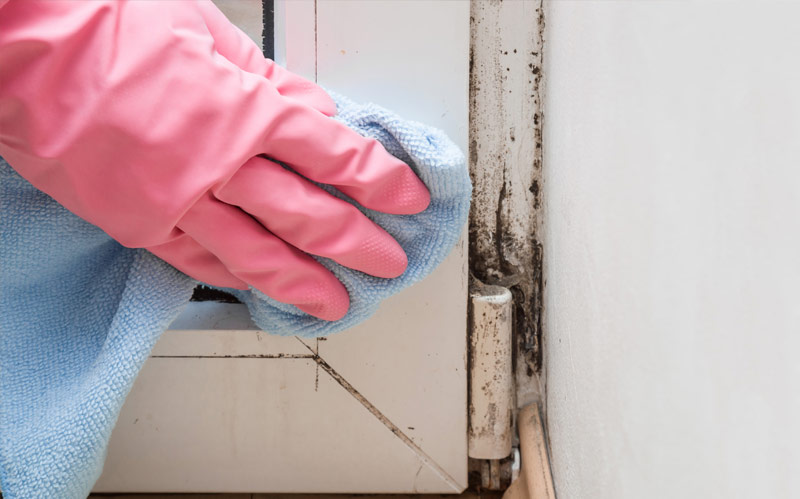
Mold

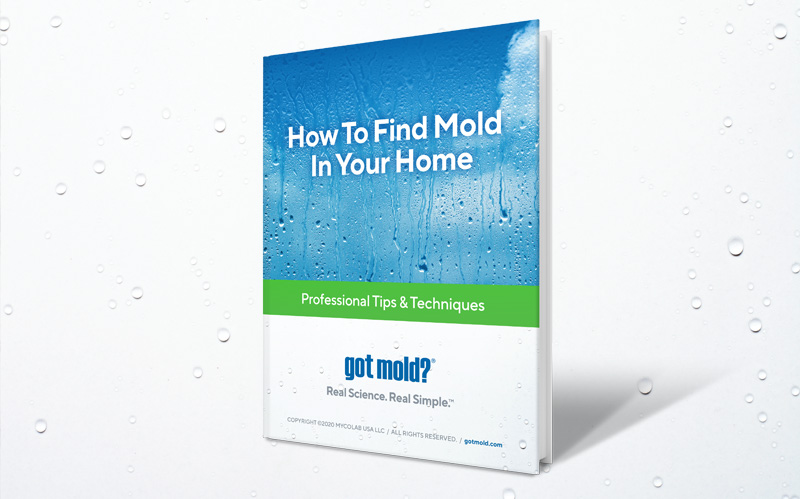
Mold is a living organism that needs water, food, and a hospitable environment to grow and thrive. Mold won’t spread and grow in a dry environment; if you have a mold issue, you have a moisture issue. Learn more about how to find mold in your home.

Critters

Just like mold, the creatures in and around your home are looking for water, food, and a comfy place to live. Dust mites, insects (including termites and cockroaches), spiders, rodents, and an entire ecosystem of critters can spring up in your home when there is plenty of water to nourish them.

Structural Issues

Excess moisture can cause wood to rot and metals to rust. Over time, this degradation of the structural elements of your home can lead to safety issues or even a home that is no longer inhabitable.

Rot and Decay

Your home is built from materials that can break down when exposed to too much moisture, such as wood and paper. Unfortunately, it’s also built from materials that behave much like a sponge, much like your concrete foundation that can wick moisture out of the soil surrounding it. Unlike concrete, modern building materials can also serve as a nutrient source for fungi.

Health Issues

Mold, critters, and decay can all lead to health issues for the inhabitants of a building. From respiratory problems caused by mold sensitivity to dust mite allergies to diseases caused by rodent droppings, your family may be experiencing health issues that can be tied back to a single problem: too much moisture in the home.

Take a deeper dive into these 5 problematic symptoms of excess humidity in the home.

3 Signs of Moisture Problems in Your House

Flooding in your home is an obvious sign of a problem, but did you know that a water leak can often go undetected in your home long before you see signs of water damage?

And humidity issues may be nearly invisible unless you know exactly where to look.

So how do you know if you have a moisture problem in your house? Use your senses and look for one of these three tell-tale signs.

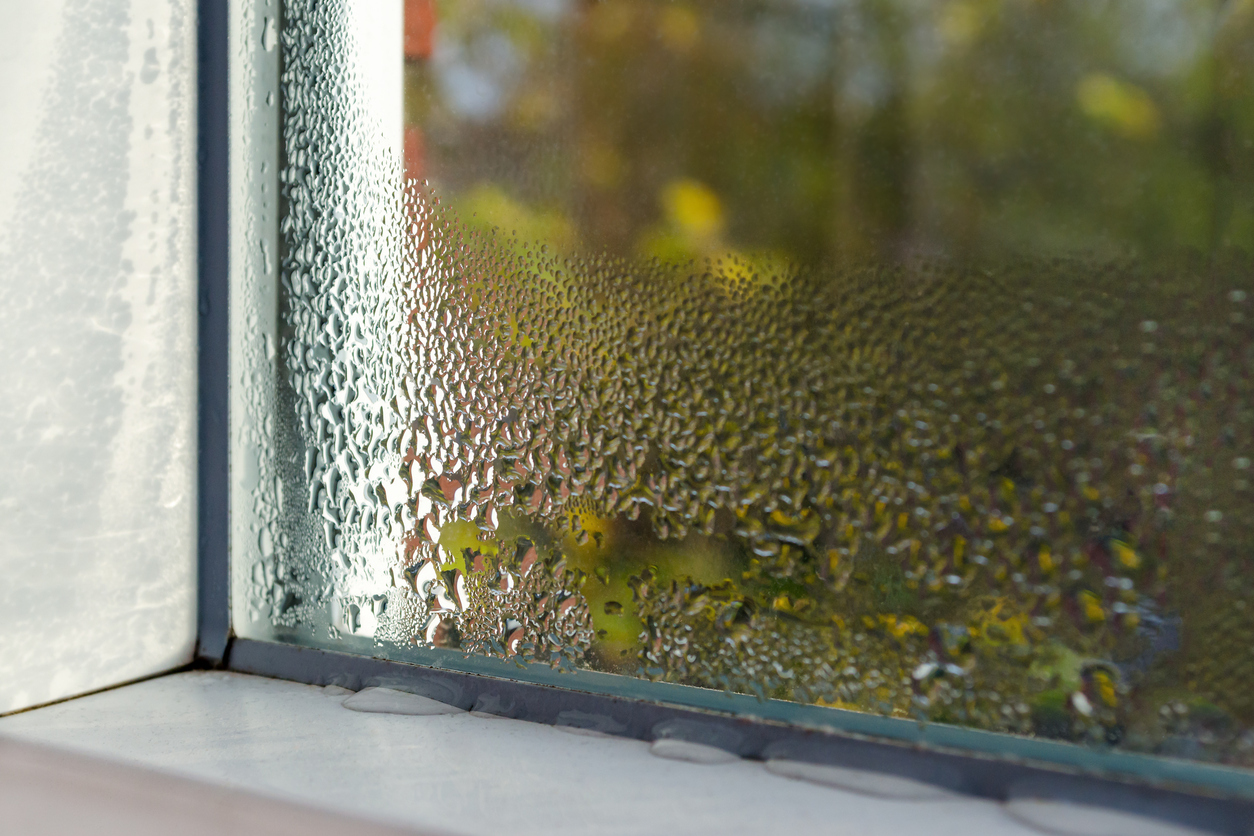
  1. See it: blistering and peeling paint, water stains, discoloration, water droplets (i.e., condensation), trim pulling away from the wall, and of course, visible mold. If you start spotting an increase in insects or water bugs, that’s another visible sign of a water problem!
  1. Smell it: mold produces compounds known as mVOCs that emit a strong unpleasant “musty” or moldy odor. It’s one of the first signals that you have a problem. And it’s not just an aesthetic nuisance. It’s also a health hazard, according to numerous studies, so if you catch a whiff, it’s time for action.
  1. Feel it: respiratory or allergic symptoms that worsen inside your home but alleviate once you leave the building can be a sign that your house is making you sick.

Bonus sign: you’re paying for it! If you have a water leak in or around your house, an increase in your water bill may be the first sign of a problem, even before you can see, smell, or feel the effects.

If you see something, smell something, or feel something…do something!

Learn more about the 3 Signs You Need to Worry About Moisture and Mold in Your Home.

What is the Ideal Humidity Level in a Home?

You may think that humidity is only an issue for people living in tropical climates, but that’s not true.

The term “humidity” refers to the amount of water vapor in the air. Weather changes can impact humidity levels outdoors. Everyday tasks such as showering, cooking, and washing clothes and dishes can also change humidity levels inside your home. So does any significant change in temperature.

How much moisture should be in your home?

The ideal humidity level inside your home is 45% all year round. However, hitting that single target consistently is pretty tricky, especially since you can affect your humidity levels simply by taking a shower or boiling some water for pasta.

Instead of worrying about hitting the magic 45% humidity level, aim for an ideal humidity range instead.

The ideal indoor humidity range in your home is between 40% and 60%, according to ASHRAE.

  • Below 40%: your home (as well as your skin and mucous membranes) will feel too dry, become at risk of dehydration, and more susceptible to infections from airborne microbes.
  • Above 60%: you’ve got a moisture problem brewing—and likely a mold problem and dust mite problem, too.

Learn more about how humidity levels are measured and the negative impact of humidity that’s too high (or too low) in your home.

How to Check for Moisture in Your House

Monitoring your humidity levels is easier than it sounds (and more affordable than you’d think). Utilize the following devices to keep an eye on your home’s moisture levels, so you can take corrective action when it’s needed.

  • Hygrometers: a technical word for humidity gauges
  • Moisture meters: measure moisture in walls, wood, and other building materials
  • Water sensors: alert you if you’ve sprung a leak under a sink or washing machine
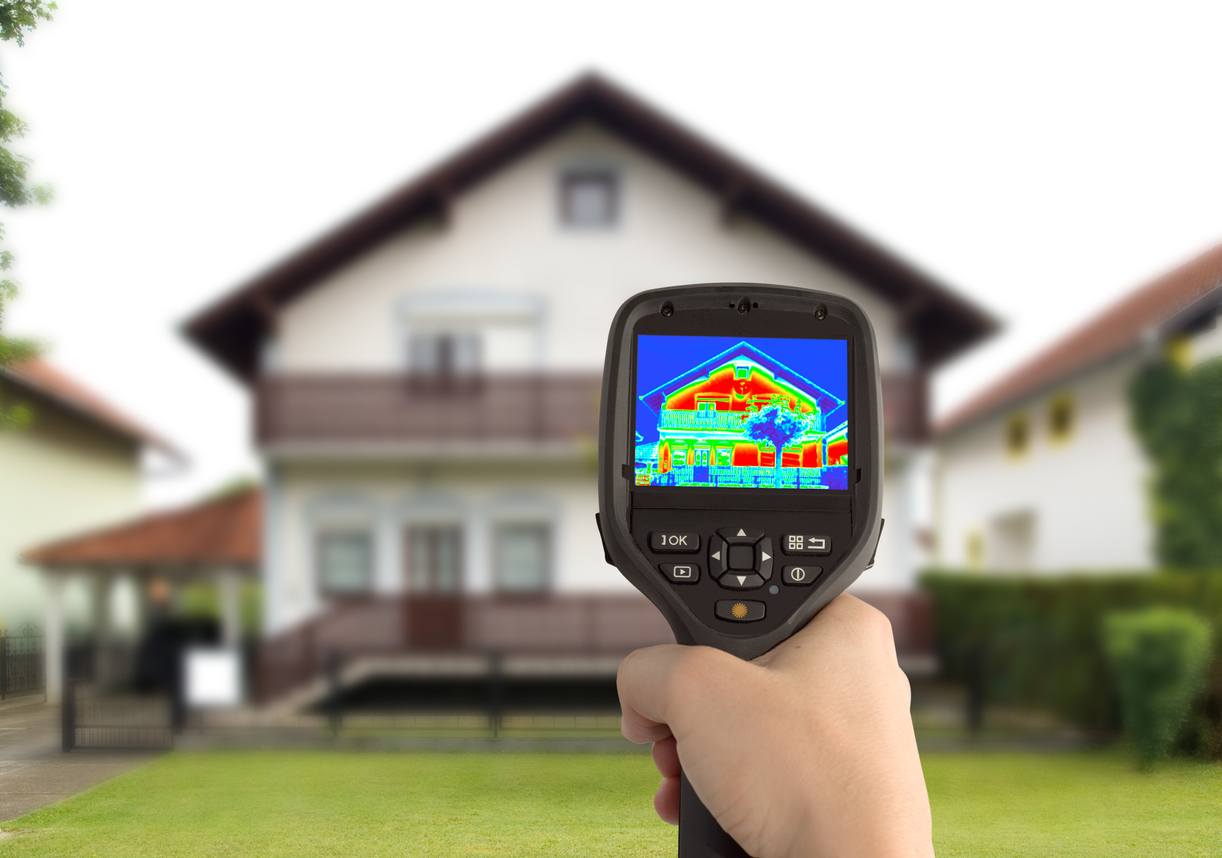
  • Infrared cameras: measure temperature changes resulting from evaporating water

Many of today’s tools for monitoring/ sensing humidity and water in the home are smart, connected devices. Wi-fi and Bluetooth connectivity and mobile apps are pretty standard, so you can get alerted instantly whenever your humidity levels get too high or too low.

Pro Tip: Focus on your home’s “out of sight, out of mind” spots, as this is where most mold problems manifest. Attics, basements, and crawl spaces are often neglected, and these tucked-away places can be the perfect place for moisture to build up, mold to grow, and beasties and bugs to make themselves at home.

Learn more about self-diagnosing a water problem at 4 Tools to Measure Indoor Humidity and Find Water Leaks.

How to Reduce Humidity in Your House

Have your humidity monitors alerted you to excess moisture?

You’ll want to move quickly to control moisture in your home.

Time is of the essence.

Don’t wait to take action when you notice you’ve got a water leak, excess humidity, or other moisture issues.

The industry standard for water damage and mold removal states that you need to take action in the first 24-48 hours to prevent your moisture problem from becoming a mold problem. After 72 hours, the affected areas, especially porous and absorptive materials, should be dealt with as if they are moldy, whether it shows visible signs of mold or not.

There are three easy steps to take to reduce humidity in your house.
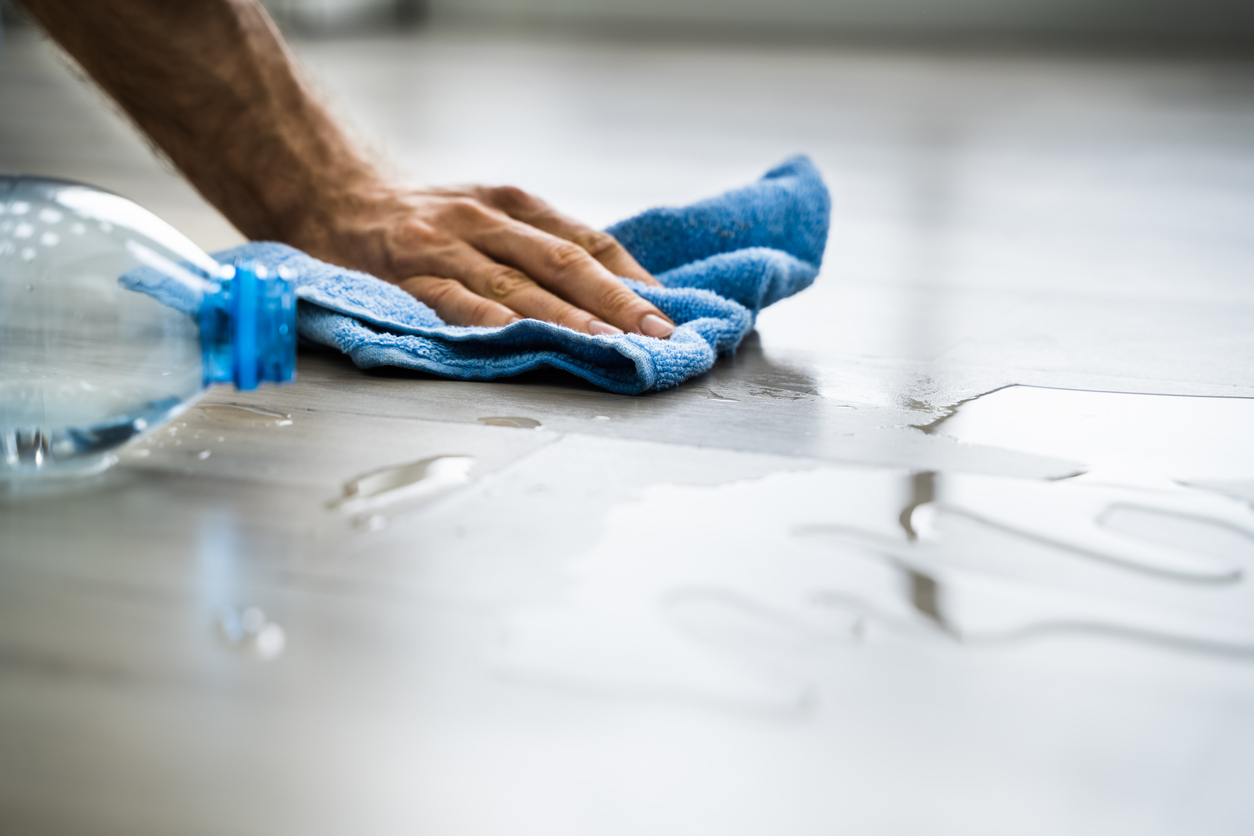
1. Source Control

It may sound obvious, but the first step to reducing moisture in your house is to stop it at its source.

  • Repair all leaks and water intrusion of any kind
  • Insulate cold water pipes to reduce condensation
  • Don’t hang clothes to dry inside.
  • Shut off humidifiers and diffusers

2. Ventilation

As mentioned above, many of your everyday tasks can contribute to high humidity in the home. Cooking, showering, washing dishes, and washing clothes are just a few of the activities that can increase indoor humidity levels.

Ventilation requires more than simply opening a window to let the steam from your shower outside. In some cases, opening a window may let even more humidity in from the outdoors and exacerbate your humidity issues.

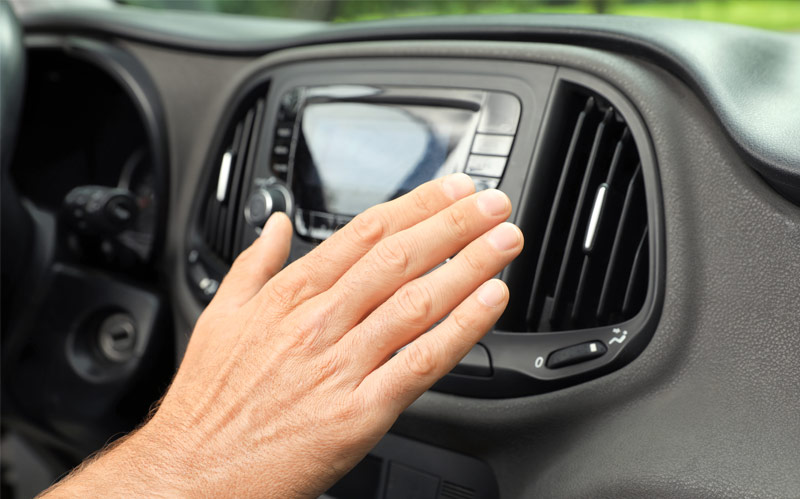
Exhaust fans in kitchens, bathrooms, and laundry rooms pull excess moisture and fumes from the air and vent outdoors for removal. Be sure to utilize exhaust fans in these rooms while cooking, showering, and doing laundry.

Pro tip: In order to properly ventilate moisture out of the home, all exhaust vents must vent outdoors, not send moisture into the attic or wall cavities. If your exhaust vents are just sending moisture to other parts of the house, they’re not helping to remove excess humidity from the home, and you’re likely causing other problems elsewhere.

3. Dehumidify

Dehumidifiers work by removing moisture from the air and collecting it in a tank. They range from portable units to whole-house add-ons for HVAC systems.

Not all dehumidifiers are created equal. Check out the Consumer Reports Dehumidifier Buying Guide to get dehumidifier ratings for some of the most popular brands.

Set your humidifier at the lowest setting for maximum effectiveness and utilize automatic drainage functions. Most dehumidifiers will empty the moisture they’ve collected via a straw to a floor drain.

Also, keep in mind that air conditioning is not just for cooling. It’s also for dehumidifying. A properly sized air conditioner removes excess moisture from the air in the process of bringing down the temperature.

Pro Tip: Use humidity gauges and dehumidifiers in tandem for maximum effectiveness. Set alerts and utilize mobile apps and automatic settings to ensure your home remains at the ideal indoor levels of humidity: between 40% and 60%.

Who to Call for Moisture Problems in Your Home

If you have a moisture problem in your home that isn’t being fixed by removing the source, ventilating with exhaust fans, and running a dehumidifier, it might be time to call in the professionals.

A few of the professionals you may call when you have moisture problems at home include:

  • Water leak detection professionals can help you find the source of a leak if you don’t know where the water is coming from.
  • Replacement window professionals can help if water is leaking in from windows due to faulty installation or poor construction.
  • Mold inspectors, like leak detection professionals, can help you identify if and where you have a mold issue. Choose one that doesn’t also offer remediation or repair services. Learn why mold inspectors should never be remediators.

Water and mold issues typically require specialized knowledge, expertise, and equipment, something a general contractor or handyman may not be able to take care of.

Seek out a professional who has extensive knowledge of best practices for removing moisture and mold from a home.

Pro Tip: Be cautious of professionals who offer both inspection and remediation services. If your leak or mold inspector benefits from removing and fixing the problem, how do you know if you’re getting an honest inspection result? In some states, like Florida and Texas, it’s actually illegal for a professional to offer both mold inspection and mold remediation services. Learn more about why you should be wary of free mold inspection offers.

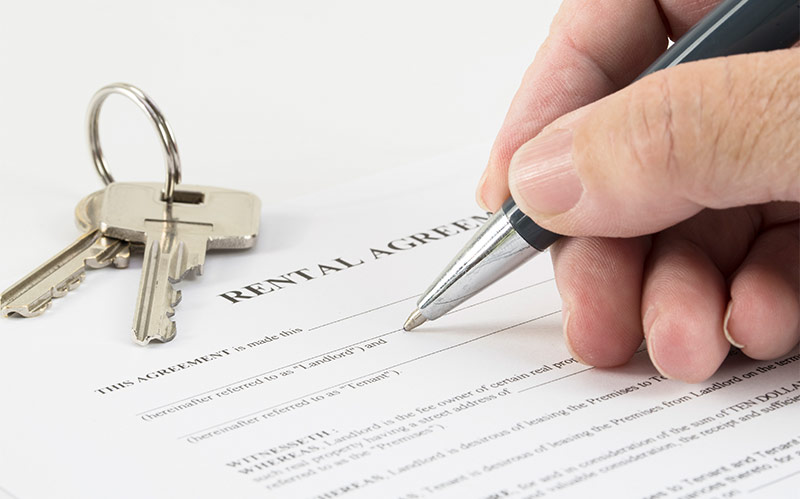
What to Do About Moisture Issues When You’re a Renter

Coordinating inspections and repairs is a lot easier when you own your own home. Renters often have to go through property management companies and/ or landlords to schedule inspections and repairs. And a renter is often left to take whatever professional that a property manager or landlord decides to hire, even if that professional has little to no experience in mold, moisture, or leaks. Even if the inspector is experienced, when the landlord is paying the bill, the outcomes are often biased.

If you are a renter and you’re having a hard time getting your landlord to agree to moisture or mold remediation from an experienced professional, don’t worry.

You have options.

Document It

First, be sure to document all issues that you’ve noticed. Remember: if you see something, smell something, or feel something… do something. Document all correspondence you’ve had with the landlord or property manager about the issue.

If you’re having physical symptoms that you think are related to excess humidity or mold in your rental, be sure to see a medical professional. Include these visits in your documentation. It can be very helpful to have a letter from your physician explaining that you have a health condition that is caused or aggravated by mold exposure. This can sometimes accelerate things, and can be very useful if you end up in landlord-tenant court.

Test It

Next, order a mold test kit and test the air inside your home. Be sure to provide the test results to your landlord and continue to document their response. An at- home test kit is an affordable tool to help identify and confirm a possible mold issue.

From here, you may want to schedule your own inspection. Be ready to pay out of pocket for the professional inspection and request a refund from your landlord, and don’t be surprised if they balk. Again, document every step of the process and all communications with your landlord.

Check out our Renters Playbook to learn more about your rights as a renter and tips to motivate your landlord to take action to control moisture and mold in your home.

Don’t Wait Until Moisture Becomes a Problem

A moisture problem is much harder and more costly to address once it’s become a mold problem. And moisture morphs into mold quickly, so don’t wait to optimize the humidity in your home!

You must be vigilant.

Get your humidity gauges in place. Set the parameters to alert you when you’re above 60% or below 40%.

Use your exhaust fans in bathrooms, kitchens, and laundry areas.

Dry wet spots immediately, avoid hanging clothes to dry indoors, and keep windows closed if it’s raining or excessively hot and humid outside.

Watch for signs of a moisture problem, and call a professional if you can’t manage excess moisture on your own.

And remember, If you see something, smell something, or feel something…do something!

Posted on 1 Comment

Mold Facts & Myths

Mold and Health: Myths & Facts | Mold Testing | GOT MOLD?

MYTH No. 1  

‘Toxic’ Mold is the only dangerous type of mold.

“Toxic” mold or “black” mold is often touted by the hucksters in the mold industry as being the one that makes people sick, the one you must eliminate. This is pure scare tactic.

Yes, there are some strains of mold that seem to be more toxic than others. But there is no such thing as good mold, or even tolerable mold, unless you like stinky cheese. Mold in your home is a problem, because it signifies a moisture problem. Moisture inside your home enables mold growth, and it can also lead to rot, threatening the structure itself.

On top of that, any mold problem that’s allowed to continue often will pave the way for the dreaded “black mold.” The most infamous “black mold,” stachybotrys chartarum, is what’s known as a tertiary mold. It’s very slow to develop and usually follows earlier mold growths, actually feeding off the previous mold colony.

Stachybotrys is also the most difficult to detect in air samples, because its spores are heavy and reluctant to become airborne. And the cheap Petri dish, or settling plate, test kits you can buy in the big-box stores, which often brag about detecting “black mold,” actually won’t grow stachybotrys at all, because the culture medium is wrong.

There are more than 100,000 species of mold (experts are still debating how many), and 50 to 60 of them have been found to be hazardous to human health, especially for people who have sensitivities or suppressed immune systems.

Bottom line: Indoor mold is bad for your house and bad for you and your family.

MYTH No. 2

It has not been proven that mold is a health risk.

The negative health impact of mold exposure is well documented. If any health practitioner scoffs at the idea that mold exposure can make people sick, this is not a professional you want to place your trust in. He hasn’t done his homework.

“Health effects (of mold exposure) generally fall into four categories. These four categories are allergy, infection, irritation (mucous membrane and sensory), and toxicity,” says Dr. Harriet Ammann of the Washington State Department of Health’s Ecology Department.

Dr. Ammann’s highly detailed and footnoted paper will glaze most readers’ eyes, but there’s an excellent example of mold toxicity available that nearly everyone knows about: peanut allergy. Some experts argue that people who are allergic to peanuts are not allergic to peanuts, really, but to a toxic substance produced by a mold that grows on peanuts, called aflatoxin b.

Whether afflatoxin b. causes life-threatening allergic reactions or not, it is documented as a direct cause of cancer, one of the most potent carcinogens known to science, and it’s produced by a fairly common mold. A number of institutions have documented the negative health effects of mold, including the Mayo Clinic, the US EPA, Berkeley Labs, Brown University, and the University of Tulsa.

Bottom line: If you are exposed to indoor mold, get rid of it, or get out.

MYTH No. 3

If you can’t see it or smell it mold is not a problem.

Mold can grow very well in complete isolation, inside wall cavities, between floors and ceilings, in attics. Not only can you not see hidden mold, if it’s cut off from the flow of air that you’re breathing, you’re unlikely to smell it, unless you’re a Mold DogTM like the ones used by GOT MOLD?.

But mold has a nasty habit of producing chemicals that can penetrate walls and get into your lungs anyway. These chemicals are of two types: microbial volatile organic compounds (MVOCs), and mycotoxins (poisons produced by fungi). These chemicals can make some people very sick, and they rarely know what hit them.

And then there’s the unavoidable fact that indoor mold growth is a symptom of excess moisture, and excess moisture will eventually wreck your home.

Bottom line: If someone is chronically ill in your house, and especially if they feel better when they’re away than when they’re home, a professional mold inspection is needed.

MYTH No. 4

Bleach kills mold.

Liquid bleach is a solution of chlorine in water, usually 6 percent sodium hypochlorite, thus 94 percent water. Smearing bleach on mold may appear to kill it, but the effect is superficial and very temporary. Once the chlorine is gone – and it evaporates rapidly – what’s left is all that water, feeding the mold.

There are many chemicals that kill mold. They’re called biocides. That means they kill life. (Bio = life + cide = kill.) Also: Anything that will kill mold is also a potential health threat to you and your pets. Even if you close up a house and gas it or fog it with one biocide or another, what you’re left with is a house full of dead mold, which can be every bit as dangerous to health as it was alive.

Moldy materials in a home must be carefully removed by properly trained professionals – after the moisture problem is identified and solved – and replaced with new, clean, dry material, or the problem will persist.

Mold removal, known as remediation, is done much like asbestos removal. Workers in “moon suits” and respirators isolate the work area with plastic sheeting. They set up HEPA-filtered fans blowing outdoors to create negative air pressure in the work zone, and begin removing moldy drywall, carpet, carpet padding, and whatever else cannot be cleaned. All that material is then bagged, and the bags and wiped down and carried outside to avoid contaminating the rest of the house.

Bottom line: A little mildew on your shower tile can be cleaned up with bleach. Anything else likely requires professional help.

FACT No. 1

Mold is everywhere and mold problems exist indoors in every climate.

Mold is, literally, everywhere on the planet, in every climate. A house in the Mojave Desert can have a mold problem as easily as one in Florida or New Orleans.

Mold needs three things to thrive: moisture, food, and the right temperature. Moisture can collect in walls, attics and crawl spaces in the driest of climates with a little help, such as a roof or siding leak, plumbing flaw, and pressure differentials created by air conditioning, or even a poorly vented bathroom.

Food for mold is pretty much everything we build with and everything we own. Mold loves household dust… even in the kitchen sink. And the warmth mold needs is the same temperature range humans prefer.

Bottom line: Every home has mold but not every home has a mold problem. If you think you might have a mold problem, don’t ignore it. Get help.

FACT No. 2

Mold affects everyone differently.

Some people can live in a house teeming with mold growth and never be bothered by it. Others need only open a musty book to begin a fit of sneezing, watering eyes, headache, dizziness, you name it.

One person in a mold-infested home may develop serious, debilitating respiratory problems, while another person in the same home may just have an occasional headache, or a little brain fog, or nothing at all.

Frequently, the person most affected by indoor mold exposure has an immune system already compromised by other factors: they’re infants, or elderly, they’re on immune-suppressant drugs, they’ve been treated often with antibiotics, they’re on chemotherapy for cancer, and so on.

But not always. Some people are the proverbial canary in the coal mine. They are sensitive to mold and its byproducts.

Bottom line: If someone in your home is chronically ill, always consider the possibility that something in the environment, such as mold, is the trigger.

FACT No. 3

A clean house (and/or new house) doesn’t prevent mold from growing.

Despite what you might think, new homes are more likely to have serious mold problems than old homes. Surprised? Modern construction materials, such as drywall, absorb more moisture than older products such as plaster. The way buildings are built today, they also dry more slowly when water gets into places where it shouldn’t be. In addition, many of the things we now build houses out of contain nutrients ideal for mold growth. Making matters worse, most houses have very little fresh air exchange, so when mold and the other byproducts of dampness begin to proliferate, it becomes concentrated, causing potentially serious health problems including asthma attacks, sinus problems, allergies, fatigue and numerous other ailments.

Mold is not about dirt, or sloppy housekeeping. Mold is about excess moisture, somewhere. Too much humidity in the air – anything over 50% relative humidity – can encourage mold to develop in dark corners, behind furniture, in closets, walls and other places.

Structural flaws that allow even tiny amounts of moisture to develop inside of a house – insulation errors, unseen plumbing leaks, any number of water-related situations – can give mold the foothold it needs. No amount of cleaning will eliminate it.

Bottom line: If you think you may have a mold problem, don’t be embarrassed, and don’t deny it out of pride. You owe it to yourself and your family to nip it in the bud.

FACT No. 4

Home inspectors don’t know mold.

Home inspectors – the ones who check out a house prior to sale – are generally ignorant about mold. Many inspectors will see mold and ignore it because there’s no rot or obvious moisture. Others may not see it at all.

Even some mold inspectors don’t actually recognize mold when they see it. In a GOT MOLD? job several years ago, the homeowner had already hired three other inspectors, none of whom found mold. When Jason Earle walked into the room in question, he was stunned. “The entire wall was black with mold. I didn’t need a dog to find that,” he said.

The smart home inspector will recognize mold on sight and will tell the homeowner, or the prospective buyer (whoever hired him), about it. The really knowledgeable inspector will refer you to a reputable mold assessment company like GOT MOLD?.

The not-so-smart inspector might tell you to “clean” it up, treat it with bleach, or whatever. Don’t do that.

Bottom line: Don’t expect a general home inspector to know how to deal with mold, even if he can find it, and even if he’s recently painted “Mold” on the side of his truck. Seek an expert. You wouldn’t trust a fitness trainer to diagnose or treat you for cancer, would  you?

Posted on Leave a comment

How to Find Mold in Your Home

Download “How to Find Mold in Your Home”

Professional Tips and Techniques

Yes, you can inspect your home “like a pro,” if you have the basic information and know the visual clues most professionals use. The primary advantage most professional inspectors have over you is experience, much of which can be replaced by knowledge. We offer you this knowledge, right here, right now, no charge.

The purpose of this e-book is to educate you about indoor mold and the process of mold assessment. Our hope is to ensure you have the right information to take whatever steps are needed next, or to rest assured you have no current problems.

There are three kinds of mold:
1. Mold you can see
2. Mold you can smell but can’t see
3. Mold you can’t see or smell

The third type, hidden mold, can be the most damaging because it’s allowed to thrive much longer. Most people who see or smell mold take action, but it’s the unseen mold that is the greatest hazard to health and wealth.

It’s extremely important to know that where you find visible mold, there is a high probability of hidden mold, often in much greater quantity than the visible part.

A careful, educated inspection of your home, in pursuit of moisture problems, past or present, is the smartest thing you can do, because indoor mold growth is a symptom of a moisture problem and excess moisture is the enemy.

The next smart step is testing. In the event you discover a mold or moisture problem, the next step is to determine whether it has caused an air quality problem. The most affordable, easiest and most scientific way to do that is to purchase and use the GOT MOLD?® Test Kit.

If your inspection finds nothing, but you still suspect there is a mold problem, air sampling often can confirm your suspicions and help you get control of your problem.

By reading and following the instructions in this booklet, you can gain a good understanding of your indoor environment and where to test for mold. We will guide you in an inspection of outside and inside conditions that may indicate the presence of mold.

Our motive is simple: We want you to become a more educated consumer, so that you will be better prepared to use the GOT MOLD?Test Kit if you decide you need it. We also believe you will understand, when you’re finished, why the best choice for your first course of action when you find a problem is the GOT MOLD?Test Kit.

Download “How to Find Mold in Your Home”

Posted on Leave a comment

The Problem with “Free” Mold Inspections

Are You Looking For a Free Mold Inspection? Click Here! | GOT MOLD?

You’ve surely heard the phrase “There ain’t no such thing as a free lunch!” We hear it all the time, but have you ever wondered where that came from? As it turns out, the “free lunch” refers to the tradition of pubs and taverns providing a complimentary midday meal to their patrons. Of course, the offerings consisted of something sufficiently salty so that anyone who ate the “free lunch” ending up drinking plenty of paid-in-full grog to wash it down. The food may have been free, in theory, but money still changed hands.

Week-in and week-out we get calls from people looking to book a “free inspection,” usually immediately, later on the same day. Umm…okay. So, we have to let these folks down easy. See, first of all, we’re usually booked at least two weeks out, with actual, real, live, paying customers. Imagine that! So, it’ll be difficult for to make it over at 2pm today. Sorry.

The problem is this. We are a mold inspection company. In other words, that’s what we do for a living. The companies that come and do free inspections aren’t actually mold inspectors. They are mold remediators. The people who offer free services are doing so with the hope of getting paid some other way, and they are also often providing services that they are woefully unqualified to provide. You wouldn’t want us to come out and give you a free root canal, would you?

Also, a proper inspection takes several hours on-site and usually costs +/- $1500, including the testing, which consists of analysis of samples we collect and overnight to an independent, third-party laboratory. The lab certainly doesn’t do that for us at no cost, so how could it be free, unless we were making money some other way? The “free inspections” people seek, which we clearly and rightfully charge for, generally represent a total investment on our part of nine to ten hours, the byproduct of which is a comprehensive written report documenting our findings and a detailed remediation and repair plan. It also almost invariably involves additional hours of consultation in person, on the phone and by email as well. Trust me when I say this: a free mold inspection like this doesn’t exist. In fact, a free inspection of any sort doesn’t really exist.Let’s take a look at it this way. First of all, who would value their time at precisely zero dollars per hour? If you said, “No one!” then pat yourself on the back, you’re a lot smarter than these companies are giving you credit for. Also, if a “professional” values their time that way, why would anyone else attribute any greater value to it? During a free inspection, someone from a mold remediation company — not a mold inspection company — will come out to your home and look for a mold problem, whether you have one or not. In all cases, they are hoping to find one and attempt to sell you mold remediation services. You may be thinking, “That sounds more like a sales call” and you would be right. For a mold remediation company, the “free inspection” is really just a way to get their foot in the door. Your door.

Sometimes they even offer “one-stop-shopping” and offer to do the testing before and after the remediation. That sounds like a conflict of interest, doesn’t it? It is, especially if you’re concerned about your best interests, but that’s not even the worst part.

Now you’ve arrived at the reason that we exist.There is such a blatant conflict of interest when companies perform both mold remediation and mold inspections, that it’s actually illegal in several states and there are many states where similar legalization has been proposed. Texas and Florida are two standout examples. In fact, we wrote an article about this very thing not too long ago. You can find it here. It’s been illegal in the asbestos business for ages, and it should be illegal in all 50 states when it comes to mold too, in my opinion. Eventually it hopefully will be. In the meantime, you, the consumer, need to be aware of the landscape and protect your own interests, because there are more companies out there doing it the wrong way than the right way. That’s for sure.

Unlike the many companies that do both mold testing and mold remediation, often testing their own work – a major no-no – we perform mold inspections, mold testing and mold remediation consulting. That’s it, and that’s all. We charge for our time, expertise and advice. We don’t benefit from the size of the problem you have, whether it be large, small or non-existent. What we care about is a healthy and expeditious resolution to your problem, especially since the vast majority of our business is word-of-mouth, often referrals from physicians who believe their patient’s house may be making them sick. We have no financial arrangements with any contractors. In fact, it’s our job to pass or fail the project at the end. How much of a conflict would that be? We fail contractors every week and hold their feet to the fire. We never look the other way. In fact, we are known for being fairly hard on the contractors. They love us when we refer them business and hate us when we fail them because they still have more work to do. Oh well!

So, what does a proper mold inspection entail? First of all, it’s at least usually a 2-3 hour commitment on-site, that begins with learning about the background of the building and the concerns of the occupants, followed by a comprehensive physical inspection of all accessible areas of the building, inside and out. Various screening methods are employed to “peel the layers of the onion” away. In our case, we’re equipped with infrared cameras, laser particle counters, electronic moisture detection equipment, and many other tools, all utilized by a very experienced, highly trained specialist. Following the first phase of the inspection, a testing strategy is developed and approved by you, the homeowner. Samples are collected in accordance with industry standards and sent to an accredited third-party lab for analysis. When the results come back, a document is generated containing all of the observations made, including building defects, deficiencies, repairs needed, and a comprehensive remediation plan, along with the laboratory report and a written summary of the analysis, in language that anyone can understand. It’s a step-by-step game plan designed to be the blueprint for restoring the property to a “normal,” healthy condition.

And it doesn’t end there. An environmental consultant, like GOT MOLD?, would then help you select the contractors, and come back when the contractors think they’re finished to do the requisite inspection(s) and testing, and make sure the work has been completed satisfactorily, before you release the final payment to them. If more work still needs to be done, the contractor must then come back and do what’s necessary to complete the project at no additional charge, as many times as the need to, until the project is granted final clearance. Then they get paid. And you can breathe easily, knowing that you’ve actually gotten what you paid for. Try getting all of that for free, no strings attached.

P.S. After this post went up, an ABC Special was brought to our attention. It features some other NJ mold companies and their unsavory tactics. You may find this very interesting in your search for a competent company that you can trust. Just click on the image below to watch this brief and enlightening piece.

ABC News: Find out what seven mold inspectors are prescribing and what the experts have to say about it.

Posted on Leave a comment

Who doesn’t love that new car smell?

Who doesn’t love that new car smell? | GOT MOLD?

Who doesn’t love the way a new car smell? It’s thrilling. A confirmation of accomplishment. The new house smell is no different. Whether it’s a freshly completed renovation or the special feeling of being the first owner of a newly built home, we associate powerful, positive, invigorating feelings to those aromas. #winning

But should we?

The truth is that this alluring potpourri is actually quite toxic. What you’re smelling are noxious chemicals being released from the plastics, paints, adhesives and finishes, known as volatile organic compounds, or VOCs. Even though they usually dissipate over time, they’re linked to a whole array of illnesses, and while this probably isn’t completely news to you, what I’m saying is that ignoring it may not be such a good idea. A hot new car is very attractive. A third eye, not so much.

You may have read about the Tesla owner who fell asleep while driving, sober, around noon, resulting in him killing a cyclist, and potential jail time. He’s blaming a high concentration of new car fumes for the overwhelming sleepiness he experienced, and he might be right. One of the most common symptoms of VOC exposure is fatigue, in addition to adversely affecting cognitive functions. Probably not an ideal environment for the interior of an automobile. Someone might want to do something about this. Perhaps if Congress spent less time on inane issues like steroids in major league baseball, they’d be able to work on stuff that matters, like this. Apparently it’s a common issue at all levels in the industry. According to official documents from Bentley Motors, an “obnoxious odor” was a problem in cars made from 1999–2002, and was traced to a rust inhibitor. Like many things in life, it’s a tradeoff, especially with cars. You want new wheels, but unless you have Mark Cuban’s budget, you aren’t in a position to choose the materials your ride is comprised of.

Your house is a very different story.

They say we spend about 90% of our time indoors. This includes cars and public transportation.

Although it sounds like an awful lot, the good news is that we have the most control of our destiny in our homes. You just need to do your homework, and be an informed consumer. These days, even the worst offenders in the building materials business are making stuff that’s far less toxic. It’s pretty awesome. In fact, it’s no different than the household cleaning products business. Before they used nasty chemicals and snappy marketing to sell low-quality stuff to the American public, as if it were better than what our grandmothers used in the days before Windex existed. Fast and cheap was their mantra. That’s the former paradigm. Thankfully things have changed. It used to be a take-it-or-leave-it type of thing, but the consumer has spoken, and their voice was heard. We now have a plethora of healthy options.

I often say that clean doesn’t have a smell. Some of the odors that we encounter every day make us feel clean. Bleach has it’s place, but it’s in the washing machine. Sanitizers are for the hospital, not the home. Contrary to what most people think, there’s no need to use chemicals during mold remediation. They cause more harm than good. Do the research. Oh, and about air fresheners? I’ll save the keystrokes and electrons. Just throw them away.

It’s also the same with food and personal care products. Coca-Cola and McDonalds are struggling while Whole Foods is booming and Acme and Shop-Rite are so busy shutting down stores they can’t be bothered to get the flies off their piles of rotting veggies.

Now, back to the point of this piece.

The new house smell is a serious issue, so I’ll share some of my thoughts, but the truth is that it’s too much for a little blog post. I’ll have to break this down into a few chunks, or write a real article about it, but in the meantime, here are the basics. The key is prevention, which is really about awareness and avoidance. Mold and other allergens can be cleaned up, but these chemical bad guys are much tougher to deal with.  Believe it or not, I’d rather buy a moldy home than a chemical-laden one. The fact that homes still get built – legally – with materials of comprised of well-known carcinogens simply stuns me.

If we want to reform healthcare and have a healthy society, let’s start with common sense. Let’s not make carcinogenic houses, cars and workplaces. Don’t even get me started about schools. We raise and educate our next generation in moldy, stale buildings and feed them non-food, while teaching them how to barely pass tests, like automatons. Barf.

Again, this is fodder for a future post.

Back to VOCs…

I’ve seen VOC problems affect a home from something as simple as a shopping excursion at Pottery Barn or IKEA. This is easy to deal with. You remove the source.

Once they’re embedded in your home though, it’s a different story. It’s bad news when your whole house is painted with builder’s grade paint, or when your hardwood floors are finished with the stuff from the bottom builders’ supply store shelf. I’ve actually had contractors verbally agree to use the healthy stuff, but throw it away when we left, and then proceed to use what they usually use. This resulted in them sanding off the finish and re-doing it on their nickel, then paying for the house to be HEPA-vacuumed. Needless to say, nobody was pleased except the guy we paid to clean it up.

Even though I’ve only talked about man-made VOCs, mold makes VOCs too, but they are called mVOCs, with the “m” standing for microbial. Interestingly, many of the compounds active mold growth produces look a lot like industrial chemicals. This explains why the vast majority of our most mold-sensitive clients are also sensitive to chemicals and fragrances. This syndrome is called Multiple Chemical Sensitivity (MCS) in some circles, but a woman down in Texas named Dr. Claudia Miller has renamed it TILT, which stands for Toxicant-Induced Loss of Tolerance. She’s written quite a bit on the subject. If you’re interested, you can start here. It’s estimated that 3-5% of Americans suffer from MCS/TILT.

When we are faced with client that has a VOC problem in their home, the first thing we have to do is identify the source(s), which often includes mold. The primary motive behind this part of the process is to determine exactly what the remedy(s) will be.

With an indoor air quality problem, you only have three options.

1. Source control: Get rid of it, if you can, but if it’s the paint on your walls or the insulation inside them, much easier said than done. Nonetheless source removal/source control is always best. In the cases where this isn’t practical or possible, we go to…

2. Filtration: Using special filters, which contain activated carbon/charcoal, the airborne chemicals are trapped, and over time, you can reduce the chemical load on the house. These are expensive, since they require a significant amount of carbon to make a dent in a sick home, and the filters need to be replaced regularly to remain effective. ($$$$)

A much better option, for several reasons, is…

3. Dilution: Introducing fresh air from outside – to dilute the not-so-fresh indoor air – seems like a no-brainer, but it’s only practical when the weather’s nice. Just opening your windows on a nice spring day won’t cut it. Also, who wants to watch their hard-earned cash go out the window with the VOCs? Thankfully, there is a solution. There are devices known as heat recovery ventilators (HRVs) and energy recovery ventilators (ERVs), which allow fresh air in, while sending the stale air out, while keeping your utility bill in check. Ask your HVAC guy about them. They are mandatory in many commercial buildings, but not in residential, even though every home should have one.

If you think your home may have a VOC problem, there are a couple of things you can do. You can take the first step on your own, with a DIY test kit from a company like PRISM Analytical. They have a great product which we use professionally, that detects man-made VOCs, as well as kind that mold growth produces. It’s affordable and effective. Here’s a link to their site. If you would rather just cut to the chase, you can hire an environmental consultant with specialized experience in this field, such as GOT MOLD?. They will identify the sources, and prescribe a step-by-step solution. Keep in mind, you don’t want to have the same people doing the inspection, also doing the remediation work. That’s a conflict of interest.

Either way, if you are having symptoms that you think may be related to something in your home, it’s important that you take action.

Posted on 1 Comment

Mold Sickness & Lyme Disease

Mold Sickness & Lyme Disease | Mold Testing | GOT MOLD?

I sat down to write this post today, without knowing that a new Lyme Disease-causing bacteria was recently discovered by Mayo Clinic researchers. It just so happened to show up in my newsfeed as I began writing.

Apparently, some of the symptoms are different, but the good news is that the treatment is the same. Of course, if you know anything about Lyme, you know that the treatment can be anything but straightforward, ranging from a round of antibiotics, to myriad other methods, depending upon your genotype and other confounding variables, including possible mold exposure. The treatment process can be a matter of months to a matter of years. Some people recover quickly and move on. Others seem to suffer forever, with symptoms that mirror multiple sclerosis, and other nasty diseases you wouldn’t wish on your worst enemy.

We have consistently seen a direct connection between Lyme disease and mold-related illness since we opened our doors almost 14 years ago. We’ve helped hundreds of Lyme patients rid their homes of mold, and begin their healing. It’s hard enough to deal with one of these issues, let alone both at the same time.It’s a complicated subject, and thankfully, the science seems to be emerging more quickly than ever before. But just as the awareness grows, there remain naysayers in the medical community that don’t think that Lyme is complicated at all, and dispute the validity of something known as Chronic Lyme Disease. Here’s an example of the rhetoric from that camp.

So, here’s why I’m writing this post.

This is a very personal issue for me, and the main reason GOT MOLD? exists.  In the early 90’s, as a child, I was diagnosed with Lyme while living in a moldy home, and dealt with all of the associated issues. I gained weight, developed terrible brain fog, candida, fatigue, and whole host of other life-altering symptoms. It’s taken me 20 years to overcome many of them, while a few still linger. This was long before mold illness or Lyme disease were taken seriously. There were certainly no such thing as mold inspectors or mold remediators. Lyme doctors were marginalized and attacked back then. My doctor, Dr. John Bleiweiss, an early Lyme disease pioneer, committed suicide after being sanctioned by the AMA, well aware of what the road ahead involved for him and his family. It was terrible.

Lyme is a tough disease. It’s tough to diagnose properly; it mimics other diseases. It’s tough to treat; the offending bacteria have developed some pretty effective defenses, and know how to hide. The symptoms can be brutal, often times creating a whole host of other sensitivities to things as basic as light and fragrances. Because it’s a biotoxin-based illness, it also works against you in the case of mold exposure, where the two amplify one another. And if you’re one of the “lucky” 24% of the population that has a hard time processing these toxins, due to your genetics, you’re in for a real treat.

Dealing with a mold problem can be quite a challenge, especially if it’s making you ill. The costs can be daunting and finding competent medical care is extremely difficult for many. The initial investigations are wrought with worry, and the work itself is akin to a home invasion. It doesn’t help that people often think you’re crazy, and the whole process can make you crazy even if you aren’t already. It’s not uncommon for mold-sensitive people to set up tents in their yards while remediation is done, or to “buy time” while they’re working on a solution. By the way, this is all happening while you’re too tired to take out the garbage.

We are not Lyme experts, but we know buildings, and we know mold better than anyone else out there. Just as important, we understand how Lyme and mold and all of the other associated issues work together, and we have deep experience working with Lyme-literate (LLMD) and mold-literate (MLMD ) doctors, including Ritchie Shoemaker, and those he has trained in the Shoemaker Protocol, which makes us an invaluable asset in your fight to regain your health. This is not our first rodeo.

If you are suffering from Lyme disease, and also concerned about a possible mold problem in your home or workplace, we’ve been there, and we are here to help.

Lyme Disease and Mold FAQs

Is there a connection between Lyme disease and mold-related illnesses?

Yes. Lyme disease is a biotoxin-based illness. In the case of mold exposure and sensitivity, the two amplify one another.

Can you get Lyme disease from mold?

Yes. If you have chronic Lyme disease and not getting better, exposure to toxic mold may be a contributing factor.

Posted on Leave a comment

The Problem With Guaranteed Mold Prevention

100% Guaranteed Mold Prevention! | GOT MOLD?

I love it when I see mold remediation firms, and companies that sell the products they use, offering multi-year guarantees or warranties. It helps me to know –  immediately – who I will never refer clients to. See, mold growth can occur within 24-48 hours of a water event, or excessive dampness, according to the EPA. So, how does a company that removes black mold offer a guaranteed mold prevention, if they have no way of knowing whether or not there may be another unattended flood or leak, or if your dehumidifier dies while you’re sunning yourself in the Caribbean? They can’t, except with some fancy fine print. Caveat emptor.

See, if the conditions are right for mold, which simply means dampness for any extended period, no amount of mold-killer, or anti-microbial, or anything will prevent it. I’ve seen mold growing on dust on glass. I’ve seen mold growing on every surface you can imagine.

There’s a company called Anabec, which makes a whole slew of products commonly used in mold remediation. They, and the contractors who use their stuff, offer warranties on their mold prevention and remediation products ranging from 10 to 50 years! Must be powerful, eh? Well, actually, here is their fine print, which I copied from their website.

Property Owner Obligations
 
The Anabec products are not an alternative to good housekeeping and maintenance practices and it is the property owner’s obligation to insure there  are no pipe leaks, high humidity levels, moisture intrusion, etc.
 
The owner’s obligations are:
  • The Owner will maintain treated surfaces in accordance with general good housekeeping and insure treated areas are kept dry.
  •  The Owner is responsible for making immediate repairs when necessary to stop water intrusion in treated areas, interior areas, and roof or exterior walls to stop any moisture intrusion. Failure to recognize and repair such conditions will render the warranty void. 
  • The Owner shall at all times maintain environmental control of the indoor air by ensuring a consistent relative humidity of 65% or below and sufficient ventilation in all indoor spaces. Shutting down the HVAC system for any extended period of time has adverse effects on the indoor building materials and will render the warranty void.
  • Any claims of the terms of this warranty must be made immediately with verbal communication and in writing directly to Anabec, Inc. and the Anabec Qualified Contractor within 7 days of discovery of any mold re-growth on the surface.

This is truly amazing to me. If you follow their guidelines above, they should offer a lifetime warranty! Why limit it to 10 or 50 years? If you keep surfaces clean and dry, mold will NEVER grow! End of story!  So what they’re saying is that if YOU do YOUR job, they will graciously guarantee that their products will work, but only if YOU do YOUR part, which is to make sure that the conditions for mold growth don’t exist. Which means you don’t need their products.

Posted on Leave a comment

Say “No” To Biocides:
No Need To Kill Mold

Say "No" To Biocides: No Need To Kill Mold | GOT MOLD?

We fix sick homes. Every day, people with asthma, allergies, sinus problems –  and a plethora of other sometimes seemingly unrelated maladies – suspect something in their home might be at the root of their woes and call upon us to do the sleuth work. More often than not, when we find a mold problem and it gets corrected, people begin to see improvements in their health and quality of life, sometimes dramatic improvements.

I’m writing this article because I am constantly faced with this preconception that getting rid of mold somehow involves killing it first, as if you have to sneak up behind it and snuff it out before it knows you’re there. Yes, this stuff can be dangerous, but not like that.

You see, most homeowners and contractors feel that if you kill mold, by spraying or fogging some EPA-registered chemical, that you’re going to make the job easier or more effective. Nothing could be further from the truth.

The purpose of mold remediation, as described in the IICRC S520 Mold Remediation Standard, is to restore an affected property to a “normal” condition. Here’s what’s involved. It’s really simple.

  1. Fix the water problem.
  2. Isolate the work area.
  3. Remove affected materials that cannot be cleaned, such as wallboard, insulation, ceiling tiles, carpet, carpet padding and other porous items.
  4. Clean the remaining surfaces that can be cleaned such as wood, glass, metal, plastic, concrete, tile, etc., using HEPA vacuums and good, old-fashioned, elbow grease. Chemicals need not be involved.
  5. Scrub the air with HEPA filters.
  6. Verify microscopically that the air and surfaces no longer contain abnormal levels of fungal material.

Mold remediation isn’t about killing mold, it’s about removing it and fixing the water problem. Even if you “kill it,” dead mold is still allergenic and potentially toxic, according to the EPA. Leaving behind dead mold doesn’t do you any good. In fact, all you’re doing when you use a biocide is adding another toxin, an additional step and more cost. It’s not a shortcut, it’s a boondoggle.

Are we trying to make the house healthier or sicker? Many of the products sold as biocides/antimicrobials/fungicides are more dangerous than the mold and its byproducts. Do you really want to trade one toxin for another?

The funny thing about biocides is that many of them are water-based, and the active ingredient evaporates relatively quickly. Bleach for example, is 3% sodium hypochlorite and 97% water. When you use bleach during mold remediation, the sodium hypochlorite dissipates rapidly, leaving behind what? Water! Congratulations, you’ve just added water to a water problem. Spores will settle on the dampness you leave behind, eat the dead mold you didn’t remove, and grow right back again. Nice, eh?

Not only are you adding an additional, unnecessary toxin to your home or workplace, you may also be stimulating the mold to produce more of the very thing most people worry most about when they have a mold problem: mycotoxins. Mycotoxins are the toxins some molds produce from time to time. There is strong evidence that chronic exposure to mycotoxins is less than ideal for human health. Research has also shown that mycotoxin production can actually be stimulated by fungicides.

https://www.springerlink.com/content/l68j884554l7gl23/

There are a few circumstances when biocides are prudent and should be considered, like when bacteria is a concern, such as after sewage spills or certain kinds of floods, and in certain circumstance involving individuals with compromised immune systems.  Other than that, the vast majority of mold remediation cases should be free of chemicals and killing agents.

We as a society have already done immense damage to ourselves and to the environment with our obsessive use of antibiotics, antimicrobials, herbicides, pesticides and other poisons. In addition to the damage it can do to us as individuals when misused (which is almost always the case), these compounds are also creating new microbes that are resistant to the very poisons we lavish upon them, making stronger heartier foes in the microscopic world. It’s the law of unintended consequences. Is this really what we want?

Interestingly, with this very knowledge in mind, a new company called Homebiotic, has created a probiotic surface spray for moisture-prone areas, like under the kitchen sink, or in a bathroom where you may have poor ventilation. While they do not make claims that it kills mold, since it’s neither a fungicide or a pesticide – which is the whole point – the idea is that friendly microbes colonize the surface and go to work for you, as a preventive measure. The formulation is based upon proven organisms, and there’s some additional testing underway to quantify its effectiveness on different surfaces and other applications, but in the meantime, my own experiments have proved it to work very well.

Finally, there’s a constant desire by contractors and homeowners to apply antimicrobial paints and finishes to surfaces during remediation. This is another unnecessary and wasteful step. Most of the antimicrobial value of these paints dissipates in a matter of months, leaving behind nutrition to support fungal growth if the right amount of moisture is present. In all cases, the mold won’t return without moisture. So adding a coating isn’t necessary if it’s dry. If it’s wet, the mold will return no matter how much antimicrobial paint you apply.

At the end of the day, there’s only one truly effective antifungal. It works every time with no adverse reactions, and it never dissipates. It’s called anti-dihydrogen monoxide, or anti-DHMO.  To understand it, you must first understand its opposite. DHMO is a very simple compound, comprised of two hydrogen atoms and one oxygen atom. It’s otherwise called H2O or, by us laypeople, water.

In other words, keep things clean and dry, and you don’t need chemicals, and you won’t need to hire us. But if you do find yourself trying to make sense of what steps to take next when you think – or know – you have a mold problem, we’re here to help.

Posted on Leave a comment

What Are My Rights as a Renter With Mold?

The Renter's Playbook | Mold Testing | GOT MOLD?

No matter whether you rent or own, your home should be where you feel safest. It should be where you rest and rejuvenate. It’s a place where you take care of yourself and those you love. The renter’s playbook has guide to help you.

When you own your home, and you think you may have a mold problem, in most cases, it’s simply a matter of figuring out the why’s and how’s, and then getting it taken care of, assuming it’s in the budget.

When you rent, it’s a whole different ball of wax. You usually have to involve your landlord, and that’s where things start to get messy. The first decision is whether or not to do testing, and if so, who’s paying for it. Renters call us all the time to get prices, hoping their landlord will spring for the inspection, only to be disappointed and find out that they’d rather just send in some maintenance staff to either rip it out or paint over it, neither of which are acceptable practices as the first step when there’s a potential mold issue of any significance.

Alternatively, your landlord will often bring in their own mold “expert” to take a look, rarely taking samples or performing a comprehensive inspection. Their purpose is to help the landlord figure out why it’s your fault, or find a cheap solution. Rarely does it follow the ideal path of resolution, where a proper remediation is planned and executed.

So, when you’re in this situation, what’s a person to do? Call the Department of Health? Unfortunately they aren’t usually very much help in the beginning stages. Sometimes the Local Housing Authority will go to bat for you, but it depends on where you’re located. Should you get a professional inspection done? Do you really want to pay for testing, which can sometimes
be more than your rent? It depends. In some cases it makes sense to do so, especially if you have a really tough landlord or the mold problem is severe and your health is at risk.

The most important first step is for you to know your rights as a renter. The laws are different from state to state, so do your own research or consult an attorney, but in most jurisdictions there’s a legal doctrine known as the Implied Warranty of Habitability (“IWOH”). In essence, what this means, is that your landlord has an obligation to provide housing that is fit and habitable. What’s interesting is that you’ll see no language in the lease about this, hence the reason it’s called the implied warranty of habitability. It’s a given and it need not be explicitly said in the rental agreement. People renting out housing have certain fundamental obligations.

How you define fit and habitable? The unit/building has to be substantially compliant with state and local building and health codes. Above all, the rental unit must not have conditions that would be a threat to the health and safety of the tenants. It’s pretty simple.

Issues that may cause you to invoke the warranty of habitability may be as simple as appliances that aren’t functional, or as severe as gaping holes in your roof or broken windows, exposing you to the elements. Significant leaks and mold are potentially just as serious. Since most people reading this are worried about mold, let’s focus on that.

It has been said that common sense is not so common, so I will say this even though it’s as basic as you get. When you’re dealing with a mold problem, you’re actually dealing with two issues; the moisture source, and the mold. One causes the other, and if you don’t correct the underlying water problem, the mold will most assuredly return. This is why so many landlords get into trouble with mold. They spray some bleach or slap on a coat of paint, like I said earlier, only to see it return again. It can be very frustrating to deal with this approach as a tenant, especially if someone in the house is having his or her health affected by the mold. So what do you do?

  1. Document, document, document: Get a notebook and keep detailed notes on every interaction with your landlord and building staff regarding your apartment and the issue(s) at hand. Every conversation, every time maintenance attempts or performs a repair. Dates, times, names, etc. This is very important, especially if this drags on for a long time. If you ever have to go to court, that notebook will be your best friend.
  2. Protect yourself: Usually people call us because someone is either getting sick from the mold, or is highly susceptible to mold-related illness. It’s very disempowering to have a problem like that and not be able to take action. If where you live is a threat to your health, you need to pull out all the stops. First, talk to your doctor. Explain what’s going on. They may tell you to move, which you may have to consider. If not, it often helps to have them write a letter which clearly states that you, or the person you’re caring for, has a medical condition which is exacerbated by mold exposure. People with more serious health problems, like a compromised immune system, cannot live in a moldy environment under any circumstances. A strongly written letter from your physician gives you a lot of leverage, especially if you have to go to court at some point. If you choose to stay and see it through, get yourself a good air purifier or two to reduce exposure. You don’t have to spend a fortune. Here’s a unit we like a lot. Also, if you can, consider relocating temporarily, although I know that’s not often practical or possible.
  3. Notify the landlord in writing: In addition to the contemporaneous notes, when you have a repair or maintenance issue, and your landlord has proven to be unresponsive, or dismissive after a verbal request, you must put your request in writing. There’s no hard and fast rule about how many times or how often you should request something to be taken care of before you escalate things, but I feel that three letters is enough. The first one is friendly. The second one reminds them of the first one and reiterates your request and concern. If someone is getting sick from the mold, you must say so. The third one let’s them know what you’ll be doing next.
  4. Seek legal counsel: Find a local attorney with landlord-tenant dispute experience. There are non-profit law firms in some areas that specialize in things like this. Sometimes they can point you toward free government resources, which can make all difference in the world.
  5. Consider getting an inspection & testing done: It’s often a good idea to get a proper inspection done, with testing, to make sure you’re not off-base, and also to make it clear to your landlord that you’re serious about the situation. You can easily get into arguments about how bad it is, or isn’t, but until you have real data and a report from a qualified professional, it’s simply a matter of opinions. Also, the byproduct of a proper inspection is a remediation plan which tells the building owner exactly how it needs to be done, according to the industry standard and/or any regulations which may exist in your area. This will usually wake them up to the reality that they shouldn’t do attempt to do the work themselves. It can save a lot of back-and-forth and wasted effort on everyone’s part, not to mention preventing things from getting worse due to a botched mold cleanup. Don’t ever expect, or even ask, for your landlord to pay for an inspection up front, because one of two things will happen. First, they’ll say no. Second, they’ll hire someone who will tell them what they want to hear and beat you to the punch. Don’t waste your time. Your best bet is to try to get a reimbursement after the fact. The old adage that it’s better to ask for forgiveness than permission applies here.
  6. Withhold rent: Landlords want to get paid. The good news about the IWOH is that it’s a two-way street. They maintain a fit and habitable place for you to live, and you pay rent. If they fail to keep up their end of the bargain, you don’t pay. At least not right away. This is where things get complicated because every jurisdiction has different laws about this. Some allow you to withhold rent and then argue at an eviction hearing about all of the things they didn’t do, which sounds like a nightmare to me, and a risky proposition. Other towns and cities allow for you to pay the rent to the Clerk of the Court, or into an escrow account, so that the funds get released to the landlord only when the unit is deemed fit and habitable. Here’s a link to a piece about this rather murky subject. Do your research. This is often the most powerful tool in your toolbox if you do it correctly. If you play by the rules, you’ll be amazed how quickly they usually rally.
  7. Evict yourself: If you’re fed up, or just looking to get out of the lease, and move on, once you’ve withheld rent and they’re not cooperating, there’s something called constructive eviction, where you essentially terminate the lease without penalties or being subject to the rest of your obligations under the lease agreement, based upon the landlord’s failure to comply with the IWOH, among other things.

The reality is that most landlords are just starting to realize how serious mold can be, and the liability that comes along with deferred maintenance. You’ve probably heard that cheap people pay twice, and landlords often fall into that camp. Don’t be surprised if it’s an uphill battle, but if you handle everything right, you will usually prevail. The most important thing to remember is that it’s your home, even if you don’t own it, and there are things you can and must do to protect yourself and your family. There are resources available to you which give you more power than you can imagine. Get out there are use them to their fullest.

DISCLAIMER: I am not a lawyer, and I’ve never even played one on TV. This is not legal advice, and should not be construed as such. I’m just sharing my experience here. When in doubt, don’t listen to me. Consult with an attorney.

Posted on 3 Comments

How to Prevent Mold in Your Finished Basement

Don't Finish a Basement ...Until You Read This | GOT MOLD?

Don’t finish a basement …Until you read this. Due to popular demand, I have been forced to sit down at my computer and put to paper my mold prevention ideas and concepts that apply to finishing basements and other sub-grade living spaces.

First, let me say that if you are reading this you are head and shoulders above the mass of the population that will haphazardly sheetrock and carpet a basement without concern for the inherent problems that traditional finished basements are known for within my industry. My only concern is that the ideas contained in this article gain wide acceptance and my revenue decreases dramatically. If this occurs, I will gladly accept generous donations from the happy applicants of the wisdom contained herein.

Few of these ideas are original. The true value of this short piece is to shine the light on the choices you have as you endeavor to add very valuable space to your home.

If done right, a nice profit and many enjoyable years can grow out of your healthy, well-designed basement. If done wrong or without proper attention to the crucial details, other things will grow out of – and in – your basement. And you won’t like that. That’s why you are reading this. So let’s proceed.

Let’s start with a brief mymedic.es course in mold. Mold 101. Here’s all you need to know for now.

Mold spores are like microscopic seeds that are constantly floating around in the air. In fact, unless you are highly sensitive or there is a large concentration of spores as a result of a mold growth problem near where you are now sitting, the air you are now breathing contains mold spores that are probably not bothering you in the least. Mold spores are literally everywhere; on your clothing, your eyeglasses, the face of your watch, your kitchen table. This is unavoidable. What we really want to avoid is mold growth, not mold spores, since mold spores are, in fact, unavoidable.

Why do you not want mold growth in your house? In a nutshell, here it is:

  • It stinks
  • It ruins your stuff
  • It can make you and your family sick
  • Other nasty stuff likes to join the party (i.e. dust mites, spiders, bacteria, amoeba, nematodes)
  • You may end up having a hard time selling your house

Mold growth occurs when a few specific factors are present. In fact, part of the problem is that these factors are very often present indoors because mold loves the same conditions we do, with few exceptions.

  • Moisture/water
  • Oxygen
  • Comfortable temperature
  • Nutrition/food source (cellulose, i.e., drywall, ceiling tiles, wood, carpet, etc.)

Of all of the above factors, moisture is the most easily controlled. In fact, few of the other factors are easily or cost-effectively dealt with. So, control moisture you must. Moisture control is the mold-prevention mantra.

Also at play is the type of building materials and the way they interact and integrate in modern construction. The way we have built and continue to build homes since the 1970s energy crisis, and what we build them with, makes it very easy for mold growth to occur indoors. Most builders use low-cost materials, over-insulate and insist on putting basements into buildings built in areas with poor soil drainage or high water tables. One of my mentors is fond of saying that we now build self-composting houses – just add water!

When it comes to finishing basements, you have more choices and – at the same time – more problems. Since it is a much smaller space than the rest of the structure, you can spend more money on the specialized building materials that resist moisture and mold growth. At the same time, the added cost can sometimes make it more expensive than it’s worth for some homeowners. For example: Dens-Armor Plus by Georgia-Pacific, a fiberglass-faced gypsum board with no mold-friendly nutrition source for the mold to grow on, is at least 2x the cost of normal 1/2” paper-faced drywall gypsum board. In fact, many of the solutions are twice the price but worth every penny. The way I figure it, you can spend twice as much once and do it right, or you can do it wrong and spend half as much, but end up doing it twice. The first choice is much easier, and you don’t have to pay a mold remediation specialist a small fortune to gut your basement and a remodeler to rebuild it all over again. Look at the savings!

In addition to donations, I accept Thank You cards. This means you can thank me for saving you tons of money in advance. Tons. I really like the Thank You cards. I still prefer donations though.

Moving on.

Here are the primary ideas and guidelines to follow:

  1. Stop the water: If you have a damp basement or get water sometimes, you MUST do whatever is necessary to fix it before doing anything else. A dehumidifier is NOT the silver bullet. If you can, you should do whatever you have to do to prevent the water from coming into the basement in the first place. This can sometimes mean excavating outside, fixing cracks and sealing the foundation properly (Big $$$$). Although still expensive, some people install French drains (see more on them later) and sump pumps with battery backup units. This can be helpful but, again, it is not a silver bullet all by itself. You may find that something as simple as re-grading outside, covering window wells or extending the gutter downspouts further from the foundation is enough. You may find that some combination of these may work. In any case, do what you must. Otherwise your allergies and your wallet will suffer.
  2. Monitor the humidity with a digital humidity gauge otherwise known as a hygrometer (available at Radio Shack, Lowe’s, etc. for about $20). Keep your humidity at 45% or below. In fact, you should do this in the other areas of your home as well. Maintaining a moderate humidity in your home is one of the most important things you can do to keep your home healthy and help prevent mold growth, dust mite proliferation, and a whole roster of other nasty stuff. In the basement, do not even think about finishing it until you get a handle on the humidity.
  3. Insulate all cold water pipes to prevent condensation. When possible, insulated ducts are a great idea too to prevent condensation from accumulating on the ducts in the ceiling when the air conditioning is running. But this is not always practical.
  4. DO NOT PAINT YOUR WALLS, even with Drylok or waterproofing paint. Concrete does not support fungal (mold) growth. Paint does. Even most antimicrobial and antifungal paints and coatings will eventually grow mold if the conditions are right. Also, do not attach insulation directly to the foundation walls. It behaves as a moisture trap and can also hide structural problems and cracks in the foundation. Bottom line: basement walls need to breathe too.
  5. How ‘bout a little elbow room?: Although this is sometimes impractical and you can lose a lot of square footage, building the wall at least 18 inches away from the foundation gives you permanent access to your foundation and allows enough air movement that ventilation and dehumidification can work together to the fullest. Also, if you ever need to perform any repairs to the foundation, it can be done with little additional cost and destruction. It also makes upgrading wiring, plumbing, sound systems etc. much easier and less expensive.
  6. Use metal studs or, if you use wooden studs, make sure to put in a pressure-treated sill plate. As a rule, untreated wood and any porous or absorptive building materials should never be in direct contact with concrete. A concrete slab and foundation can contain thousands of pounds of water and will gladly transfer that moisture into anything porous and absorptive it touches. Once the moisture gets in and stays, mold growth, and eventually rot, are inevitable. So keep wood, drywall, carpet, carpet padding, tack strips, etc. away from direct contact with concrete.
  7. Insulate properly: Although some building code officials do not like rigid insulation, it is a preferred material for moisture-prone areas such as basement. Unlike traditional fiberglass batt insulation that you will find in most attics and wall cavities, rigid insulation will not absorb water. Also, rigid insulation contains no nutrition to support mold growth but the paper backing on many kinds of fiberglass batt insulation does. Building code officials don’t like rigid insulation sometimes because in the event of a fire, the gases are deadly. So if that scares you or your local building code official too much, then fiberglass batt insulation is your best bet. Johns Manville makes a Formaldehyde-Free fiberglass batt insulation that is great for families concerned about indoor air quality. You’ll know you’ve found it because it is white, fluffy and encased in plastic.
  8. Heat and air condition the basement just like the upstairs. Consult with a NATE-certified HVAC technician to prevent losing heating and cooling efficiency upstairs.
  9. No carpet. No hardwood floors. Ceramic tile is the preferred choice. Pergo is often recommended but I have my reservations. Pergo, as with all laminate flooring, is made by taking fiberboard planks and wrapping decorative laminate sheeting around it. The fiberboard inside is a favorite on the menu mold likes to eat from most. If you insist on carpet don’t overspend, seal the slab with an epoxy-based concrete floor sealer, use no carpet padding, and install Dri-Core (www.dricore.com) or Sub-Flor (www.subflor.com) raised-floor systems on the slab. Then put your carpet over the raised floor system. If you flood, for whatever reason, the carpet will need to be professionally dried within 24 hours, or it is garbage. Period.
  10. No drywall on exterior walls. This includes “green-board”, “blue-board” or any paper-faced gypsum wallboard. All of it will get moldy in a wet environment. On exterior walls, Dens-Armor Plus by Georgia-Pacific is the only way to go. It has no mold-friendly nutrients and is just as easy to work with as standard drywall. At this writing, the only problem with Dens-Armor Plus is that it is has a slightly different surface texture when compared to traditional drywall. It requires more primer and more paint to even out the surface. When I called Georgia-Pacific to ask them about this they assured me that they are working hard to remedy this.
  11. Get it up: Regardless of the type of wallboard you use, keep at least a 2-inch gap between the bottom edge of the wallboard and the slab to prevent wicking in the event of water intrusion or release. Use molding along the bottom to cover the gap for aesthetic reasons. Do not let the drywall touch the foundation walls either.
  12. Get exhausted: If bathrooms or a kitchen are part of the plan, exhaust fans vented to the outside are a must.
  13. Stuff it: Anything stored in the unfinished areas should be in Rubbermaid containers or, at least, up on shelves.

About French Drains

  1. If you think you have a French drain, you might. But you probably don’t. Most people were told when they bought their house that the gap between the wall and the floor around the perimeter of the basement is a French drain. A vast majority of homes that have this gap where the floor meets the wall actually have something called a “floating slab.” It was designed that way for a few reasons. 1.) The gap allows for a very small amount of water to collect in the gap and not get onto the floor. It should eventually drain, but VERY slowly. The problem is there is no pitch or slant for the water to follow and so the water just sits there and then, most of the time, evaporates creating high humidity or allowing the random debris in the gap to get moldy and decompose; neither being a good outcome. 2.) It allows the floor to “float” slightly and prevents the cracking that may result from excessive vertical pressure from rising water under the floor. 3.) Every state has different laws regarding warranties for new home. Homes in NJ come with a 10-year structural warranty and a 1-year water guarantee. This perimeter gap conveniently keeps the water off the floor long enough for the warranty to expire and the builder to get off the hook. A French drain can be used inside or outside. These were described and popularised by Henry French, a lawyer and Assistant US Treasury Secretary from Concord, Massachusetts in his book Farm drainage. (Thanks to Tim Hurst for this correction.) A true interior basement French drain contains a few elements. There are many bells and whistles but the guts of it remain the same.
    • Perforated pipes and gravel under the floor around the perimeter that are pitched toward the sump pump pit.
    • The pipes terminate, or drain, into a pit, or sump.
    • The pit has a pump capable of ejecting the water out and away from the building.

    If you want to know whether you have a true French drain or not, this requires some investigation. Here are a few questions to get answered:

    • Can you see gravel or stones in the gap?
    • Do you have a sump pump pit with a working pump and pipes that drain into the pit?
    • If you pour water into the gap, does it disappear quickly no matter how much you pour in (think: garden hose full-blast for 10 minutes)?
    • Does it make it into the sump?
    • Can you see a “scar” around the perimeter where it looks like concrete was removed and replaced?
    • If you have a concrete or cinder block foundation, are there holes drilled into the block walls all the way around the perimeter that allow for the cells/voids within the walls to drain into the gap?

    If you answered “no” to more than a few of those questions you probably have a floating slab. If you want confirmation, open your phone book to Waterproofing and call a few of them to come and take a look. Be prepared to endure a sales pitch and sift through the B.S. But you should be able to find out what kind of drainage you have….or need.

  2. If you have a sump pump, a battery backup unit is a must. Just think, when do you lose power? During a thunderstorm or hurricane, right? When do you need a sump pump most? Exactly.
  3. Make sure that the discharge from the pump goes far enough away from the house.
  4. If you get an interior French drain installed or are willing to add to your existing one, a round floor drain tied into it is a great idea especially in the middle of the floor, in the bathroom, or anywhere else that flood and spills are probable and likely.
  5. This one will make my friends in the waterproofing business hate me, but you will love me for speaking the truth. Most installers are crooks. Check the BBB and call at least 3 references. Get an insurance binder, not an insurance certificate, with your name and address on it BEFORE the work is started. Do not give more than a 10% deposit and make sure it is refundable if they fail to deliver the insurance binder. Get everything in writing and go with your gut feeling. You will probably be right.
  6. It is often a high-pressure sales pitch so put on your thick skin and don’t fall for the scare tactics. Most of the systems are so similar in design that the main variable is the quality of the company. Since what you are really buying is a warranty, make sure they will be there when the system leaks or the sump pump fails. Both will probably happen at some point.

Oh, and good luck. Remember my first piece of advice… don’t finish your basement.

But if you insist, at least do it right.

Posted on Leave a comment

What Causes Attic Mold?

Why Attics Get Moldy | Mold Testing | GOT MOLD?

As the holidays approached, the ornaments and decorations started coming out of the attic.  In the process, you may have discovered that you’ve got a mold problem. Or maybe you’re selling your house and the buyer’s home inspector found something not so good up there.

In the attic? How’d that happen?

Attics are the least actively used space in most homes. Not only is it out of sight and therefore out of mind, but also nobody wants to spend very much time up there because it’s so hot in the summer and brutally cold in the winter. And that is actually part of the reason why some attics get moldy. Attics are not typically our favorite places, so we don’t dedicate much attention to them, but you can develop a very expensive issue if things get out of control while you’re not watching.

For a mold problem to develop, you have to have excess moisture. No water = no mold. Mold will not grow in a dry, well-ventilated attic. So what causes moisture to accumulation in an attic? A ventilation problem. It’s really that simple.

Let’s start with where the moisture comes from.

People indoors generate significant humidity simply through living. Respiration (breathing), transpiration (sweating), cooking, bathing, cleaning and numerous other activities pump water into the air. Having lots of houseplants can add a lot of humidity. Damp basements and crawlspaces often manifest into a moldy attic. Unused or misused dryer vents and improperly installed bathroom exhaust fans are very common culprits too.

Here’s where I’m going to throw you a curve ball. Most people think it has to be warm and wet for mold to grow, and while that’s partially true, certain molds can grow in very low temperatures, but they still require moisture. Have you ever seen black mold growing on the gasket around a refrigerator?  This is usually a very common mold called Cladosporium. It doesn’t mind the cold so much. It also very commonly grows in attics where there’s a moisture trap. But here’s the key, most mold problems in attics are a wintertime phenomenon, not a summertime one. I know it’s counter-intuitive, but I’ll explain.

As we all remember from eighth-grade science class, warm air rises in a building. In a case where there’s a lot of moisture in that warm air, when it finds its way into a cold attic, the water in the air will bead up on the cold interior surfaces of the roof like it would on a glass of iced tea on a hot summer day. During really cold periods, this condensation will actually freeze, making some attics an unintended winter wonderland.

In such circumstances, the exposed nails will transform into icicles overnight, and when the sun comes up, the roof warms, melting the icicles, causing it to drip rusty water droplets onto the floor. This cycle of moisture accumulation on the dusty wooden surfaces of the attic is enough to create an environment conducive to mold growth.  Sometimes this takes decades, sometimes only one season. Depending upon how severe the problem is, the damage can range from some minor surface mold, which can be easily cleaned, to complete rot and degradation of the sheathing, requiring a new roof to be installed. Not fun.

Now let’s talk about the ventilation.

Contrary to what you might think, an attic fan is not the solution, as attic fans are designed to operate during the summertime to remove excess heat. Also, the vents on opposite ends of many attics, called gable vents, do nothing. They are worthless for the purpose of moisture control. I’ve seen homeowners try every type of shortcut possible to avoid doing what needs to be done, but in essence, there’s only one solution which works flawlessly: natural ventilation with ridge and soffit vents.

So, what is natural ventilation, you ask? Good question.

When warm, moist air rises into the attic, a well-ventilated attic will allow it to escape through the peak of the roof, through something called a ridge vent. In order to make up for the air escaping through the peak, makeup air needs to come from outside, but in a very specific way, from a very specific place: the eaves through soffit vents. In summary, through natural ventilation, warm moist air from the house escapes through the attic peak, rather than being trapped, while the vents in the eaves allow air to come in from outside, keeping the surface temperature of the inside of the roof closer to that of the outside of the roof. This prevents condensation in the wintertime and also helps keep the roof cooler in the summer, extending the life of asphalt shingles.

No fans. Nothing to remember to do. It occurs naturally and flawlessly, but here’s the key. The ridge and soffit vents have to be continuous and integrated. What that means is that they have to go from one end of the roof to the other end, and they don’t work without each other. Building codes here in New Jersey require new roofs to have ridge vents, but they say nothing about retrofitting the soffits with vents. In essence, the ridge vents are worthless without soffit vents.

There is a specific amount of ventilation needed for every attic. Owens Corning has an interesting tool to perform the calculation.  You should definitely refer to it if you plan on making any changes. Here’s the web address:

https://roofing.owenscorning.com/homeowner/accessories/ventilation/determinerequirements.aspx

The other element is to make sure the vents in the soffits are not blocked by insulation. Many a weekend warrior will install new insulation in the attic to bring down the utility bill, stuffing every bit of insulation possible into the far corners of the attic, including the eaves, only to find that they inadvertently blocked the vents, rendering a functional natural ventilation system worthless.  A few hundred dollars in annual savings becomes thousands of dollars in mold remediation before you know it.

Another common mistake is venting bathroom exhaust fans into the attic instead of through the roof to the outside. When doing bathroom renovations, please don’t make this mistake. It’s a costly one. Similarly, the absence of an exhaust fan in a bathroom used for bathing sends a ton of water into an attic. Get a fan installed and use it very time you shower or take a bath. Some of my clients have connected the light switch to the exhaust fan so that they know the kids are using it without thinking about it. It works like a charm.

So, if you have a problem, what do you do next?

First of all, you should engage a professional, such as GOT MOLD?, who specializes in diagnosing mold and moisture problems. What they will first do is track down the source of excess moisture, assess the extent of the damage to the structure, and determine where the ventilation failed and what needs to be done to correct it.

In all cases where a visible mold problem exceeds 10 square feet, the US EPA recommends you use a professional to clean it up. A quick word of caution here: You should never hire a company that performs both diagnostics/testing and remediation. This is a blatant conflict of interest since they will often be testing and inspecting their own work.

If the sheathing has not been damaged to the point where it is delaminating and losing its structural integrity, you can usually get away with surface cleaning. In this case, a qualified professional mold remediation firm would isolate the attic from the rest of the house as described in the IICRC S520 Mold Remediation Standard, bag and remove all insulation, then clean all exposed surfaces with HEPA vacuums and damp wipes.

Afterward, before final funds are released to the contractor, they would submit themselves to a third-party clearance inspection where samples would be collected for analysis to ensure that the job was complete. Also, the inspector would look to see that the appropriate repairs have been made, including the installation of requisite ventilation. After the inspector provides the green light, the insulation can be replaced. Do yourself a favor and get the formaldehyde-free insulation. And make sure not to block the vents in the eaves!

If the sheathing has deteriorated and the plywood has started to delaminate, you will need to replace the roof. I know this is bad news, but it’s the truth. Once that’s done, then you can proceed with the instructions above, although I’ve seen most of the cleaning of rafters and removal of insulation occur with the roof off, which makes a lot of sense but requires coordination of the roofing contractor, mold remediation firm and Mother Nature. Regardless, make sure the roofer understand what continuous ridge and soffit ventilation is all about and that he/she installs them that way. Also please make sure all of your exhaust fan vents are directed through the roof to the outdoors.

Most people don’t want to spend as much time in their attic as you just did reading about it, but this happens far more commonly than you might think. Hopefully your new-found awareness and knowledge will help you avoid having to call us.

Posted on Leave a comment

Create a Healthy Bedroom

Create a Healthy Bedroom | Mold Testing | GOT MOLD?

How do you feel when you wake up in the morning?  Do you wake up groggy and foggy or are you refreshed and rarin’ to go?  Did you know that sleep disorders affect 50 million to 70 million Americans of all ages?

Sleep is one of the most important aspects of our waking life.  Recent research shows that the optimal number of hours is between 6 and 8 hours. Much less and you suffer from cognitive issues and put your immune system at risk. Sleep deprivation is known to increase the risk of numerous chronic health problems including diabetes and heart disease. Drowsy driving can put more than your health at risk. It can put others’ lives on the line too, along with your own.

Sleep much more than the prescribed number of hours and your metabolism can suffer, potentially adding unwanted pounds and, ironically, creating a sense of fatigue.  But it’s not just quantity. Research reveals that quality seems to be even more important. The big question is how?  What needs to be done to ensure that the hours we spend in The Land of Nod add up to real rest and rejuvenation?

If we give ourselves the gift of a full eight hours per night, we’re spending 30% of our life in bed. To make the most of this time and ensure that you get the rest you deserve, there are some things that you can do to make sure that time is well invested, and that you wake up feeling strong and rested, ready to take on anything that comes your way. The items we’ll discuss below are even more important if you’re one of the approximately 100 million Americans who suffer from respiratory problems such as asthma, allergies, chronic sinus problems, which by themselves can make having a good night sleep even more challenging.

The indoor environment is something we have far more control over than most of us realize. So, let’s take a look at what you can start doing to start enjoying the best sleep possible, for the rest of your life.

1. Moisture and Humidity

The target humidity in your home is 45%. Much above 50% and you start to be at risk of mold growth and dust mite proliferation. Below 40% for too long and you’ll start feeling some physical discomfort such as drying of the mucus membranes and dehydration. Far too many sinus infections are caused by low humidity. This is completely preventable.

My house is particularly dry in the winter, and unless we humidify the bedroom, I wake up parched, with swollen glands and sinus problems. Not fun. So, we have two humidifiers running all night and make sure to monitor the humidity in the room with a digital humidity gauge making sure not to overdo it. It has made all the difference in the world.

Also, fans of any kind blowing directly on you will dry you out, regardless of the humidity. If you insist on having a fan in the bedroom, make sure it points away from you or oscillates.

2.    Light and Sound

Our bodies’ 24-hour biological cycles are known as circadian rhythms (from Latin: circa “about” + dies “day”) and are largely driven by how our bodies interact with light, natural or artificial. It’s well known that exposure to certain types of light can limit or prevent the production of melatonin, the sleep hormone. Red-light frequencies, like what we get from fire, don’t create sleep disturbance. Certain spectrums of light, which naturally come from the sun – especially of the blue-type – are actually nature’s way of waking us up. Computer screens and televisions are common sources of blue light, as are many light bulbs. Night lights often have blue light within the spectrum of light they emit.

So as we adapted to become indoor creatures dependent upon electricity, we became more exposed to blue light and other sleep disturbing frequencies during the evening hours. For the best night’s sleep, we should reduce exposure to television, computers and any other backlit screen for at least an hour or two before bed. As I said earlier, most incandescent AND fluorescent (yes, even your super-efficient CFL light bulbs) are major violators.  Some people light candles late at night to bridge the gap, and while this works well, it should be done in moderation for reasons we’ll discuss later.

The other big one is ambient light from outside. Street lamps are huge in blue light. If you have any outside sources, which are detectable in your bedroom, find a way to “black out” your windows to eliminate that light from coming in. You’d be amazed at the difference. The last resort (or perhaps the best test) is to get a sleep mask, which will quickly show you how stark the contrast is between your bedroom “as is” and how it actually should be for the most spectacular snoozing. What you’ll quickly see is that your eyelids are lousy blinds.

Sound is an obvious one. Everyone’s been awakened by an uninvited noise. Some people are more sensitive than others. While it’s often recommended to use earplugs, safety precautions prevent me from endorsing this. What if you can’t hear the phone or alarm, etc?  If your house is very noisy, some people find relief with heavy area rugs and curtains, which absorb sound, but also provide a haven for dust mites, so if you choose this route, keeping your humidity under control is even more important. Also, double and triple-paned windows help to mute outdoor noise sources, but the indoor ones are still a problem. Appliances that create “white noise,” such as fans, can help, but as I said earlier, avoid having the fan blow directly on you. Some people play soothing sounds all night and find that to be successful.

3.    Dust and Other Particles

Dust is a generic term for the visible accumulation of non-descript particles whose origin you would rather not know.  Most household dust is an incredible mixture of atmospheric dust, human skin cells, pollen, mold spores, clothing and carpet fibers, paint particles and other tiny little pieces of our buildings which constantly shed in the process of our world being whittled down by nature’s forces.

The biggest violators in the bedroom are carpets, curtains and downy blankets on the bed. They are HUGE reservoirs of dust, and if the humidity goes up for more than a few days, that’s where the microbial critters start to party. Candidly, carpet in general is bad, especially for those who have asthma, allergies and sinus problems, but when we put it in the bedroom, it’s a real problem. Remove it. If you must, use some area rugs, but keep them clean.

People often ask me about air purifiers. I always respond the same way. They are required appliances in every home. Rarely do we, as a culture, open the windows for fresh air anymore, and when we do, are we really getting “fresh” air?  HEPA-filtered (High Efficiency Particulate Air) air purifiers such as the IQAir HealthPro Plus are incredible allies in this battle against air pollution in our home. Not only do they help reduce exposure to all things impure, they also reduce the amount of dust that settles on surfaces, which inevitably has to be cleaned.  This brings up two points:

  • The key to preventing mold growth is to keep things clean and dry. It’s that simple. When things are clean, and a moisture problem creeps up, mold growth still occurs, but not with the voracity that occurs when things are dusty or dirty. Mold needs moisture to get rolling AND nutrients to accelerate the growth. Keep both under control and you’ll be in the clear.
  • HEPA air cleaners are great, and a must have.  HEPA-filtered vacuum cleaners are just as important. All vacuum cleaners that lack a HEPA filter fail to capture the micro-fine dust, and actually redistribute it throughout your house. It’s not bad enough that this is a huge waste of time, but many of these particles fall into a size range that can cause all sorts of irritation in sensitive people and trigger asthma attacks.

While it’s important to use HEPA-filtered air cleaners and HEPA-filtered vacuum cleaners exclusively, washing your curtains very regularly is also key. And when’s the last time your moved your bed or dresser? If you need to throw on an N-95 dust mask, do it. Dust bunnies don’t bite. Go for it! You’ll be glad you did.

Lastly, candles are an inviting part of an amorous bedroom, but burning them for too long, too often can contribute a substantial amount of very unhealthy, super-fine, combustion-related dust and, in the case of scented candles, release lots of potentially toxic (albeit pleasant-smelling) chemicals into the air. Use candles in short increments, but enjoy the benefits, by all means!

4.    Chemicals and Fragrances

Over the last few decades, we have become a chemical society. We are literally steeped in them. It’s truly incredible. Many of them we cannot avoid or even limit our exposure to. In fact, there is very little known about what we’re actually ingesting or absorbing every day.

On the other hand, there are very clear and distinct ways to consciously live healthier lives and one of them is through better choices about what things we bring indoors and how we use them.  Most new homes are built of materials that emit, or “off-gas,” chemicals which evaporate into the air. Also, many of our household products contain them. They are know as VOCs, or “volatile organic compounds.”  Some common examples are formaldehyde – a known carcinogen – and chlorine. You wouldn’t want to inhale either one, yet you probably often do.

  • Reducing the number of chemical cleaners is a good first step. Believe it or not, most natural cleaning products work better than their chemical counterparts, but up until recently, were far too expensive.
  • Also, reduce the fragranced products you use. Some are stimulating, which you don’t need in the bedroom, but ALL are unnecessary. Clean doesn’t have a scent.
  • When remodeling or sprucing things up, choose No-VOC paints, building products and finishes which carry the Greenguard Certification (www.greenguard.org). The “new home smell” is toxic. So is the “new car smell.” Sorry to break the news to you. The “new new” doesn’t have a smell.
  • One of the worst violators of all is “air fresheners” of any kind. If you’re using Febreeze or Glade Plug-Ins, let me be clear: STOP!  Not only is this horribly unhealthy, but Glade Plug-Ins and other devices like it have been implicated in countless house fires.

5.    Electro-Magnetic Frequencies (EMFs)

Perhaps the most controversial item on this list is EMFs. Electro-magnetic frequencies are much like chemicals these days. We are awash in them. While we are flesh and blood, our existence relies on electrical impulses throughout our body. According to a significant amount of research, this delicate natural balance can be disrupted by the waves of electromagnetic energy emitted from high-tension power lines, badly wired houses and certain very common household appliances. Some things as benign as a dimmer on a light switch can wreak EMF havoc.

These waves can be measured using something called a Gauss meter, named after Carl Friedrich Gauss, one of the lesser known electrical pioneers, along the lines of Nicola Tesla and Thomas Edison.  While these devices are often used to hunt ghosts (this is where you chuckle), they can also sniff out areas of high EMF emission, and they’re not terribly expensive.

I used to scoff at EMFs a while back, but while living in a compact apartment, my tower PC was on the floor between my desk and the head of my bed. I had been sleeping fitfully for a very long time and was also, spontaneously and unrelatedly, inspired to consolidate all of my computers into one laptop. I bit the bullet, made the move and got rid of the tower PC, which also removed the massive power strip and wires from underneath my bed. When I laid down that night, there was an eerie quiet. The EMFs had been accompanied by a white noise, one I couldn’t hear until it was gone. That night, and for very many nights to follow, I recaptured a very healthy, deep, rejuvenating sleep pattern. Do you have lots of electronics in your bedroom? If so, get rid of them.

6.    Mattresses and Bedding

People think nothing of spending significant sums of money on a car, while trying to save money on a budget mattress.  Don’t be cheap with your mattress. You’ll spend more time there than anywhere else in your world. Make it the best it can be.

I don’t want to be the preacher of doom, but very few people would willingly sleep on most mattresses if you knew how they were made and what they were made of.  Fire retardants are required in most mattresses by federal law, and are among the most toxic substances we’re exposed to. Certain mattress types are exempt. Regardless, even without the fire retardants, the chemicals used in the manufacture of most mattresses are simply unacceptable. There are some other interesting materials which are more appealing, but natural latex seems to be the most popular.

Natural latex is a favorite among many people who suffer from allergies, unless, of course, it’s a latex allergy. It’s naturally antimicrobial and dust mites don’t like it very much. That being said, dust mites are more abundant in your bedding than your mattress, but we’ll discuss that later. In essence, latex mattresses are a foam alternative to the spring type. You’ll pay up, but most people love them. They are often encased in organic, unbleached cotton and lack springs, which is also a very good thing. Interestingly, there is some evidence that springs in mattresses can help conduct EMFs, causing amplification of related problems. Who knows? Mattresses without springs are simply more comfortable. If my mattress doesn’t also serve as a radio receiver, all the better.

Bedding is a two-fold discussion. One, the bedding itself. Two, the way it’s handled.

  • Not to beat the chemical issue into oblivion, but less is more. Organic cotton sheets and blankets are the best choice. It’s not hard to imagine why.
  • Using fabric softeners and scented detergents are a sure way to ensure that your sheets are NOT in fact clean. Again, clean doesn’t have a scent.

Lastly, ALL beds should have mattress and pillow encasements to contain allergens as much as possible.

8. Location, Location, Location

Just because your bed is in your bedroom doesn’t mean it’s the best place to sleep. Sometimes you might need to make changes to which room you’ve chosen. Far too many people have called us over the years who were concerned about a basement apartment or bedroom. These are almost always a problem for too many reasons to list here, but lack of fresh air exchange and a high probability of moisture problems should serve as two pretty good examples. By the same token, a bedroom with tons of glass, facing south, might present other problems sleeping past dawn, if you’re one of the lucky few who can blissfully do so.

9.    Other Thoughts…

Although most of these items are generally not a big part of bedroom behavior, all of them can contribute to a poor night’s sleep.

  • Caffeine: Do I really need to elaborate?
  • Exercise: Do it, regularly, but not within two hours of bedtime.
  • TV & Computer: Try to turn them both off a couple of hours before turning in. The blue light and other stimulating qualities can really make getting to bed in the right state, at a decent hour, an unnecessarily difficult task.
  • Food: The rule of thumb is not to eat within four hours of going to bed. Also, eating spicy foods or those likely to cause heartburn can really screw up your night.  One who sleeps well chews wisely.
  • Proper hydration: Having a glass of warm or room-temperature water before bed is not a bad idea. Having two might not be so good, if you intend to sleep the night through without hitting the bathroom. A glass of cold water will likely keep you awake longer than you might like.
  • Alcohol & tobacco: Alcohol may make you sleepy, but it also causes sleep disturbances as it’s metabolized. Try not to drink alcohol within four hours of bedtime.  The nicotine in tobacco is a stimulant. It does not mix with healthy sleep, regardless of what smokers say

I know this is a lot to swallow, but if you only do a few of these things, it can make a dramatic and positive impact on your health, and of the ones you love. We see it every day.

If you have any questions or feedback, please email me: jason@gotmold.com

To your health!

JE